
Choosing the right cane is less about the leg and more about the brain; it’s a sensory tool that provides stability by giving your brain critical feedback from the ground.
- The correct cane height and handle type prevent shoulder and hand pain by optimizing your biomechanics.
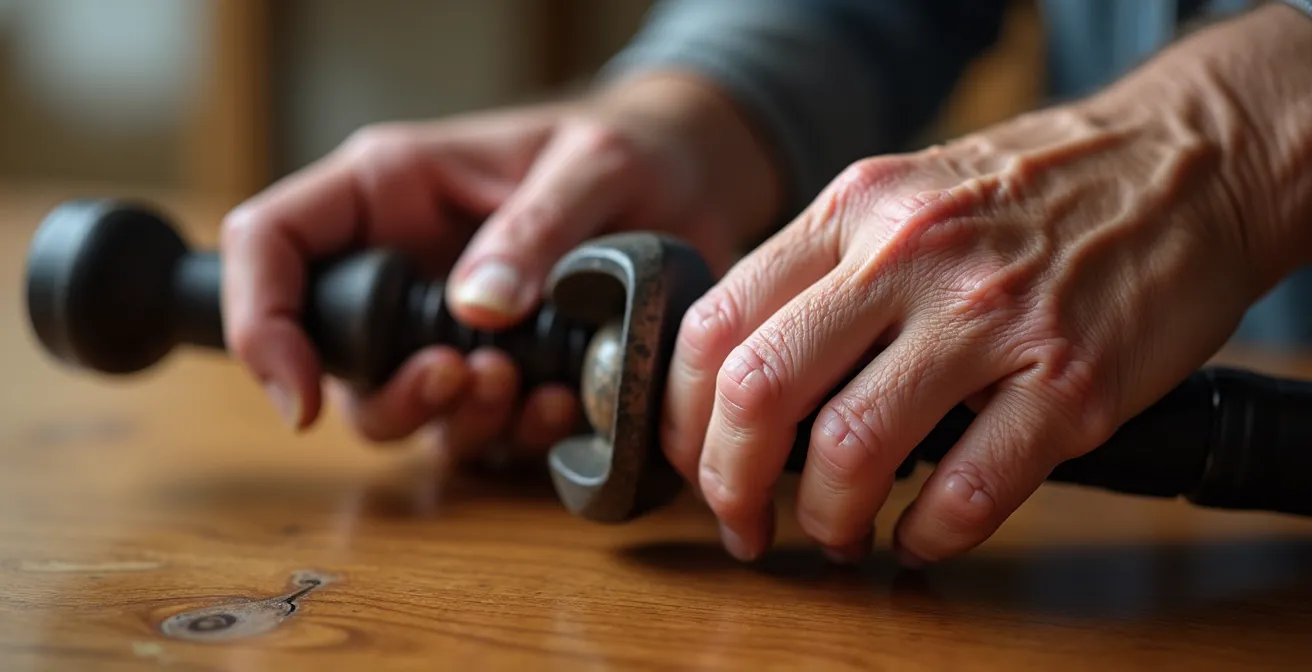
- Regularly inspecting your cane’s tip is a non-negotiable safety measure to prevent dangerous slips.
Recommendation: Focus on creating a custom grip and mastering the contralateral (opposite side) walking technique to significantly offload weight from a painful joint.
When joint pain or a slight feeling of unsteadiness appears, the idea of using a walking cane often comes to mind. For many, the choice seems simple: pick one that looks sturdy and feels about right. The common advice is to find an “ergonomic” handle and make sure it’s the “correct height.” But this approach often leads to new problems: a sore wrist, a tired hand, or an aching shoulder, turning a tool meant for support into a new source of discomfort. The focus remains on the cane as a simple crutch, a third leg to lean on.
But what if the true power of a cane, especially for those with arthritic hands or dizziness, has been misunderstood? What if its primary role isn’t just physical support, but sensory feedback? The key to unlocking a cane’s full potential lies in seeing it not as a prop, but as an extension of your sensory system. It’s a device that communicates vital information about the ground to your brain, enhancing your natural balance and confidence. This shift in perspective changes everything about how you should select and use it.
This guide will move beyond the generic advice. We will explore the biomechanics of how a cane provides stability even when your legs are strong, how to achieve a truly personalized fit that prevents pain, and how the right components—from the handle you grip to the tip that touches the ground—work together. By understanding these principles, you can transform a simple walking aid into a sophisticated tool for pain-free mobility.
To help you navigate this new approach, this article is structured to build your understanding from the ground up. We will cover everything from the sensory science behind a cane’s effectiveness to the practical steps for customizing your aid for maximum comfort and safety.
Summary: A Guide to Selecting and Using a Cane for Arthritic Hands
- Why a Cane Helps With Dizziness Even If Your Legs Are Strong?
- How to Measure Cane Height to Prevent Shoulder Pain?
- Standard Tip or Quad Base: Which Offers Better Stability on Carpet?
- The “Slippery Tip” Hazard That Makes Canes Dangerous
- How to Add Foam Grips to Reduce Hand Fatigue?
- How to Use the “Three Points of Contact” Rule on Stairs?
- How to Use One-Touch Can Openers to Save Your Wrists?
- How to Offload Body Weight From a Painful Hip Using Aids?
Why a Cane Helps With Dizziness Even If Your Legs Are Strong?
It’s a common misconception that a cane is only for leg weakness. The truth is, one of its most powerful functions is to act as a sensory antenna for your brain. This concept, known as haptic grounding, is crucial for managing dizziness or mild balance issues. Your brain’s balance system relies on three inputs: your eyes (vision), your inner ear (vestibular system), and your body’s sense of position (proprioception). When one of these is compromised, a cane provides a fourth, reliable stream of information. By simply touching the ground, the cane sends constant tactile feedback up your arm, giving your brain a stable reference point to anchor your sense of balance.
You don’t even need to lean on it heavily for this to work. In fact, research shows untrained cane users naturally transfer only 7.2% of their body weight through the cane, yet still report increased confidence. This is because the cane isn’t just a physical support; it’s a neurological one. It calms the “wobble” by giving your brain an extra anchor in the world. It tells your brain, “Here is the ground. It is solid and stable,” which can override the faulty signals that cause dizziness.
Mastering this involves more than just holding the cane. It’s about actively integrating it into your sensory system. By practicing techniques like applying consistent downward pressure and synchronizing your steps with the cane’s placement, you train your brain to trust this new input. This builds confidence and can significantly reduce the anxiety that often accompanies balance problems, making you feel steadier on your feet even if your legs are perfectly strong.
How to Measure Cane Height to Prevent Shoulder Pain?
The standard advice for cane height—stand up straight and align the top of the cane with your wrist crease—is an excellent starting point, but it’s not the final word. This static measurement doesn’t account for how your body moves when you walk. The true goal is to find a height that keeps your elbow slightly bent (about 15 to 20 degrees) and your shoulder relaxed *during movement*. A cane that is too high forces you to hike your shoulder, leading to strain and pain. A cane that is too low causes you to stoop, compromising your posture and balance.

This is where the concept of dynamic measurement becomes essential. It’s an adjustment process based on real-world use. The Cleveland Clinic’s occupational therapy department has pioneered a protocol to refine this fit. Their experience provides a valuable insight:
Cleveland Clinic’s Dynamic Height Adjustment Protocol
In this protocol, patients first set their cane to the standard wrist crease height. Then, they are observed walking a short distance. Therapists check for any sign of the shoulder lifting or the trunk leaning away from the cane. The protocol reveals that approximately half of all patients require a 1-2 inch adjustment from the initial static measurement. Often, taller individuals need a slightly shorter cane than the formula suggests to prevent “shoulder hiking” and maintain a natural arm swing.
To apply this yourself, start with the wrist-crease measurement. Then, walk around your home and pay close attention to your shoulder and posture. Ask a friend or family member to watch you walk from behind. Is your shoulder on the cane side lifting with each step? If so, your cane is likely too high. Lower it by one increment (or half an inch) and try again. This iterative process ensures the cane fits your unique gait, not just your static height, preventing shoulder pain and promoting a healthy, upright posture.
Standard Tip or Quad Base: Which Offers Better Stability on Carpet?
The choice between a standard single tip and a multi-pronged quad base is a common dilemma, especially when considering indoor surfaces like carpet. A quad cane, with its four small feet, offers superior static stability. It can stand on its own, making it convenient for users who need to free their hands frequently. However, this same design can become a hazard on carpet. The multiple points of contact increase the risk of one of the prongs snagging on thick or uneven pile, which can trip the user or jolt the arm. For this reason, quad bases are best reserved for users who need support primarily for standing up and sitting down, not for active walking.
For navigating carpets, a standard single tip is generally the safer and more mobile option. It glides over the surface with minimal risk of snagging. However, not all single tips are created equal. Modern designs have expanded beyond the basic rubber stopper to offer enhanced stability without the drawbacks of a quad base. For instance, wide-base single tips provide a larger surface area for better grip, while pivoting tips are engineered to maintain full contact with the ground even as the cane’s angle changes, making them excellent for uneven surfaces like plush carpeting.
Ultimately, the right tip enhances the cane’s primary function: offloading weight to reduce joint stress. As studies demonstrate that proper cane use achieves a 10% reduction in knee load, selecting a tip that allows for a smooth, confident gait is paramount. The following table breaks down the performance of different tip types.
| Tip Type | Carpet Performance | Weight (oz) | Best Use Case |
|---|---|---|---|
| Standard Single | Good mobility, minimal snagging | 2-3 | Walking on all carpets |
| Wide-Base Single | Better stability, moderate mobility | 3-4 | Transitions carpet/hard floor |
| Pivoting Tip | Excellent on uneven pile | 4-5 | Mixed carpet heights |
| Quad Base | Superior static stability, snag risk | 8-10 | Standing support only |
The “Slippery Tip” Hazard That Makes Canes Dangerous
A cane is only as safe as the small piece of rubber that connects it to the ground. Over time, this tip inevitably wears down, hardens, and loses its grip, creating a significant “slippery tip” hazard. A worn tip can easily slide out on smooth surfaces like tile, polished wood, or wet pavement, leading to a sudden loss of balance and potentially a serious fall. This is not a minor detail; it’s one of the most critical safety aspects of using a walking aid. Many users overlook this, continuing to use a cane with a tip that is dangerously past its prime.
The rubber compound in a cane tip is designed to be soft enough to grip the floor. With use, exposure to the elements, and age, this rubber hardens and becomes brittle. A hardened tip has as much grip as hard plastic, rendering it ineffective and hazardous. The tread pattern also wears away, reducing its ability to channel away water and maintain contact with the surface. It’s recommended that regular outdoor cane users should replace tips every 3-6 months, or even sooner if they cover significant distances.
Fortunately, inspecting and maintaining your cane tip is simple and inexpensive. Integrating a regular check into your routine is the best way to prevent a slip-related accident. Think of it like checking the tires on your car; it’s a fundamental part of safe operation. Following a structured inspection schedule ensures your cane remains a reliable partner in your mobility.
Your Cane Tip Safety Audit Checklist
- Monthly Check: Perform the “fingernail test.” Press your fingernail firmly into the rubber tip. If it doesn’t leave a temporary indent, the rubber has hardened and lost its grip. It’s time for a replacement.
- Visual Inspection: Look for uneven wear patterns on the bottom of the tip. If one side is significantly more worn than the other, it could indicate an issue with your cane’s height or your walking pattern.
- Tread Depth: Check for smooth, bald spots where the tread has completely worn away. Any visible cracks in the rubber or exposure of the metal washer inside are immediate signs that replacement is necessary.
- Rotation Schedule: For daily users, consider having 2-3 spare tips and rotating them monthly. This extends the life of each tip and ensures you always have a safe one ready.
- Surface-Specific Strategy: If you frequently switch between indoors and outdoors, consider using a softer compound tip for indoor tile and a harder, more durable one for outdoor concrete to optimize both grip and longevity.
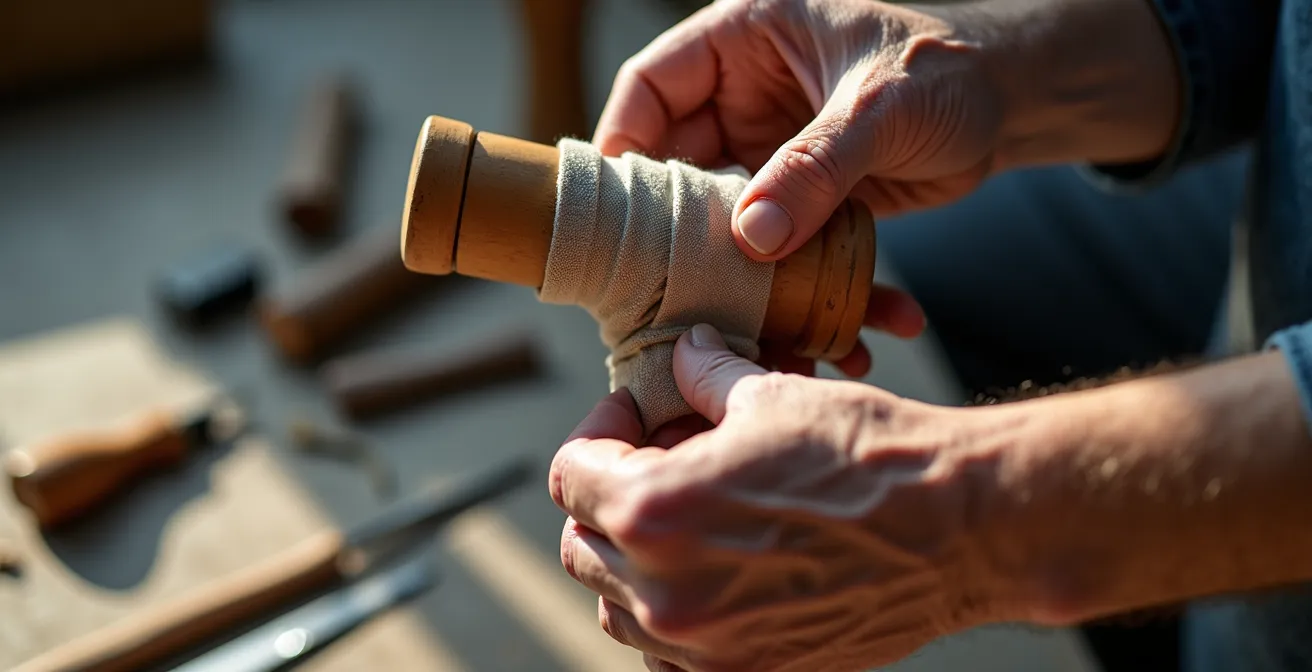
How to Add Foam Grips to Reduce Hand Fatigue?
For individuals with arthritis, the handle of a cane is the most critical point of contact. A standard, hard handle can concentrate pressure on sensitive joints, causing pain and fatigue. While many seek out “ergonomic” or “foam” grips, the real solution often lies in creating a personalized grip architecture—a handle built up in layers to perfectly match your hand’s size, shape, and needs. This goes far beyond simply sliding on a piece of foam; it’s a process of creating a custom interface that distributes pressure evenly and reduces the force needed to hold the cane securely.
The ideal handle allows you to maintain a relaxed grip without fear of it slipping. Its diameter should be large enough that your fingers don’t have to wrap tightly around it, and its surface should be cushioned yet firm. Historically, designers have recognized this need. As noted by Alex Orthopedic, a specialist in mobility aids:
Fritz handles were designed by a German Count in the 18th century and was designed to make cane use by someone suffering from Arthritis more bearable
– Alex Orthopedic, Historical development of arthritis-friendly cane handles
This principle of designing for comfort can be applied today with modern materials. You can build your own custom grip using readily available items like bicycle handlebar tape, tennis racket overgrip, and moldable thermoplastic putty. The process involves first determining your ideal grip diameter, then building up layers for cushioning, and finally shaping the grip to create custom grooves for your fingers. This ensures pressure is spread across your entire palm, not concentrated on painful knuckles.
How to Use the “Three Points of Contact” Rule on Stairs?
Stairs present a unique challenge for cane users, as they require a coordinated shift in balance and strength. The key to navigating them safely is the “three points of contact” rule. At any given moment, you should aim to have three solid points of contact with the stairs: two feet and the cane, or one foot, the cane, and a hand on the handrail. This creates a stable “tripod” that supports your body as you move up or down. Rushing or trying to take two steps at a time breaks this rule and significantly increases the risk of a fall.
A simple mnemonic helps to remember the correct sequence: “up with the good, down with the bad.” This refers to your stronger (“good”) and weaker or more painful (“bad”) leg.
- Going Up: Your stronger leg has the power to lift your body weight.
- Place your cane on the step above you first.
- Step up with your stronger leg.
- Bring your weaker leg and the cane (if not already there) up to the same step.
- Going Down: Your weaker leg and the cane control the descent.
- Place your cane on the step below you.
- Lower your weaker leg down to that step.
- Bring your stronger leg down to join it.
When a handrail is available, it should always be used, as it provides far more stability than a cane alone. Hold the rail with the hand on that side and use the cane in the other hand. If your grip is weak or painful due to arthritis, don’t clench the rail. Instead, slide your open palm along the top of the rail for balance. Most importantly, move one step at a time. Pausing on each step to ensure you are stable before proceeding is a sign of caution, not weakness.
How to Use One-Touch Can Openers to Save Your Wrists?
Managing arthritis effectively means thinking beyond just walking aids. It involves a holistic approach to joint protection in all daily activities. The strength and dexterity in your hands are finite resources, and every task that strains your wrists, fingers, and thumbs—like opening a tight jar or using a manual can opener—depletes that resource, leaving less capacity for gripping your cane securely and without pain. This is why adopting assistive tools in the kitchen isn’t a luxury; it’s a strategic part of your overall mobility plan.
A one-touch electric can opener is a prime example. These devices latch onto the can and cut the lid with the press of a single, large button, eliminating the need for forceful gripping and twisting that is so damaging to arthritic joints. By saving your hands from this strenuous task, you preserve their strength for what matters most: maintaining a safe, comfortable grip on your cane when you are on the move. The same principle applies to a wide range of kitchen gadgets designed to reduce stress on your hands.
Converting your kitchen into an arthritis-friendly space can be done progressively. Start with the tasks that cause the most pain or require the most force, and then gradually incorporate other tools.
- Priority 1 (High-Strain Tasks): Replace manual can openers with a one-touch electric model, use a rocker knife that cuts with a push-down motion instead of sawing, and switch to a peeler with a wide, cushioned handle.
- Priority 2 (Twisting & Squeezing): Get a V-shaped wedge jar opener that uses leverage, a lever-style bottle opener, and spring-loaded scissors that open automatically to reduce hand fatigue.
- Priority 3 (General Gripping): Use utensils with built-up handles (1.5-2 inches in diameter), a non-slip cutting board, and measuring cups with large, easy-to-hold handles.
Even small changes, like adding inexpensive foam tubing to the handles of your existing utensils, can make a significant difference. Every bit of strain you save in the kitchen is an investment in your stability and comfort when you walk.
Key Takeaways
- A cane’s primary benefit for balance is providing sensory feedback (“haptic grounding”), not just physical support.
- Cane height must be confirmed with “dynamic measurement” (while walking) to prevent shoulder pain, not just a static wrist measurement.
- Regularly inspect your cane tip for hardening and wear; it’s the single most important safety check to prevent slips.
How to Offload Body Weight From a Painful Hip Using Aids?
The most profound biomechanical benefit of a walking cane is its ability to offload a significant amount of weight from a painful joint, such as an arthritic hip or knee. This is achieved through a specific technique that is often counter-intuitive to new users. To effectively reduce pressure on a painful hip, the cane must be held in the contralateral hand—that is, the hand on the opposite side of the body from the painful hip. Holding it on the same side can actually worsen your gait and offer minimal support.
Here’s why it works: when you walk, your body naturally sways from side to side to keep your center of gravity over your supporting leg. When you have a painful hip, the muscles around it have to work extra hard to stabilize you. By placing the cane in the opposite hand and pushing down on it as your painful leg swings forward, you create a new, wider base of support. This action allows your torso to remain more upright, significantly reducing the force the hip abductor muscles must generate. This, in turn, dramatically lowers the compressive load on the hip joint itself.
The effect is not trivial. Biomechanical studies confirm that correct contralateral cane use achieves a 15-20% body weight reduction from the affected joint with each step. For a 150-pound person, that’s like taking 22 to 30 pounds of pressure off their painful hip every single time they take a step. This reduction in load directly translates to less pain, reduced inflammation, and improved function over time. The success of this technique is well-documented:
Two-Point Gait Training Success in Osteoarthritis
A randomized controlled trial with patients suffering from knee osteoarthritis demonstrated the power of this technique. After two months of daily training in a proper two-point gait (moving the cane and the affected leg forward in sync), the group using the cane showed significant improvements in pain reduction and physical function. They performed better on walking tests and used less energy to walk, confirming that this synchronized movement optimizes biomechanical efficiency and reduces strain.
By embracing these principles—from sensory grounding to biomechanical offloading—you empower yourself to use a cane not just as a support, but as a sophisticated tool for a more active, confident, and pain-free life. To put these concepts into practice, the next logical step is to have your current equipment and technique evaluated by a professional, such as a physical or occupational therapist, to ensure you are getting the maximum benefit.