

In summary:
- Focus on Joint Protection Principles: Use tools that keep your wrists straight and use larger muscles to operate.
- Prioritize Energy Conservation: Adapt your kitchen layout and workflow to minimize movement and allow for seated preparation.
- Embrace Task Modification: Choose the right tool by analyzing the task—opt for containment (food processor) for tremors and control (rocker knife) for weakness.
- Plan for Collaboration: Implement component-based meal prep to make it easy for caregivers to assist without taking over.
The sharp, aching pain in your hands can turn a simple act of love, like chopping vegetables for a family meal, into a daunting and painful task. For many seniors dealing with arthritis, the kitchen transforms from a place of creativity into a landscape of obstacles. You might find yourself reaching for pre-packaged, processed meals not because you want to, but because twisting a lid or gripping a knife feels impossible today. The common advice is often to “get a food processor” or “buy some gadgets,” but this rarely addresses the root of the problem.
As an occupational therapist specializing in hand therapy, I can tell you the solution isn’t just about collecting tools. It’s about developing a strategy. The real key to reclaiming your kitchen is to think like a therapist and apply three core principles: Joint Protection, Energy Conservation, and Task Adaptation. It’s about fundamentally redesigning your cooking process so that it works for your body, not against it. This guide will walk you through this strategic approach, transforming your kitchen from a source of frustration into a space of safe, enjoyable independence.
This article provides a detailed roadmap, broken down by common kitchen challenges. We will explore specific tools, techniques, and setups designed to empower you to cook safely and comfortably, guided by proven therapeutic principles.
Summary: An Occupational Therapist’s Guide to Arthritis-Friendly Cooking
- Why Inability to Open Jars Leads to a Diet of Processed Foods?
- How to Use One-Touch Can Openers to Save Your Wrists?
- Electric Food Processors or Rocker Knives: Which Is Safer for Tremors?
- The Cast Iron Mistake That Causes Wrist Fractures
- How to Set Up a “Sit-Down” Prep Station for Long Cooking Sessions?
- How to Reduce Walking Distance Between Sink and Stove?
- How to Fortify Your Soups Without Altering the Taste?
- How to Plan a Weekly Menu That Caregivers Can Easily Prepare?
Why Inability to Open Jars Leads to a Diet of Processed Foods?
The struggle begins with a simple twist. When grip strength fades and joints ache, a tightly sealed jar of tomato sauce or a can of beans becomes an insurmountable barrier. This isn’t just a minor inconvenience; it’s a critical turning point that can silently steer you away from fresh, home-cooked meals toward a diet heavy in ultra-processed foods. These convenience meals, while easy to open, come at a significant cost to your health. The link is not just anecdotal; it’s a documented concern in clinical practice and research.
The reliance on these foods creates a negative feedback loop. A diet lacking in fresh ingredients can exacerbate inflammation and other health issues, which in turn reduces your energy and motivation to cook. As one study in Clinical Rheumatology notes, this is a serious concern for individuals with inflammatory arthritis. The research highlights that patients with rheumatoid arthritis consuming more ultra-processed foods showed worse metabolic profiles and higher cardiovascular risks. Breaking this cycle starts with identifying and solving these small but crucial barriers in the kitchen, making fresh ingredients accessible again.
The inability to perform a simple task like opening a container forces a dietary compromise that has long-term consequences. By addressing the physical challenge with the right tools and techniques, you aren’t just opening a jar; you are reopening the door to a healthier, more controlled diet and preserving your nutritional independence.
How to Use One-Touch Can Openers to Save Your Wrists?
Once we recognize that inaccessible packaging is a primary driver of poor dietary choices, the one-touch can opener emerges as a first-line defense. This device is a perfect embodiment of the joint protection principle. Traditional can openers require a pinching grip and a repetitive, stressful twisting motion—a combination that is particularly damaging for arthritic wrists and thumbs. The one-touch opener eliminates these movements entirely.
Using one is a simple process of task modification. You simply place the device on top of the can and press a button. The battery-powered mechanism does all the work, rotating around the lid and cutting it cleanly without any effort on your part. Many models include a magnet that lifts the lid for you, so you never have to touch a sharp edge. This simple gadget replaces a high-stress, multi-step task with a single, low-impact action. It protects your small, vulnerable joints by offloading the work to a machine.
When choosing a device, it’s important to consider your specific needs. While a manual adaptive opener might be cheaper, an electric one-touch model is far superior for anyone with significant pain, weakness, or tremors. The following table breaks down the key differences from a therapeutic perspective.
| Feature | Electric One-Touch | Manual Adaptive |
|---|---|---|
| Hand Force Required | Minimal (button press only) | Moderate (turning motion) |
| Power Source | Battery or corded | None needed |
| Cost Range | $25-50 | $10-25 |
| Suitable for Tremors | Yes | Limited |
| Maintenance | Battery replacement/charging | Manual cleaning only |
Electric Food Processors or Rocker Knives: Which Is Safer for Tremors?
When it comes to chopping, the choice of tool often comes down to a critical trade-off for those with tremors: containment versus control. An electric food processor offers high containment, making it an excellent choice for safety. By enclosing the blades and the food, it completely eliminates the risk of an unsteady hand coming into contact with a sharp edge. However, this safety comes at the cost of control; you often get a less precise cut and can easily turn vegetables into mush.
On the other hand, a rocker knife offers a high degree of control. This tool, which has a curved blade and a handle you can press down on with an open palm, allows you to use your body weight rather than fine motor skills. The rocking motion is more stable than a traditional chopping motion. It’s an excellent example of task modification that leverages larger muscle groups and protects small hand joints. For someone with weakness but stable hands, it’s ideal. For someone with significant tremors, the open blade still poses a risk.
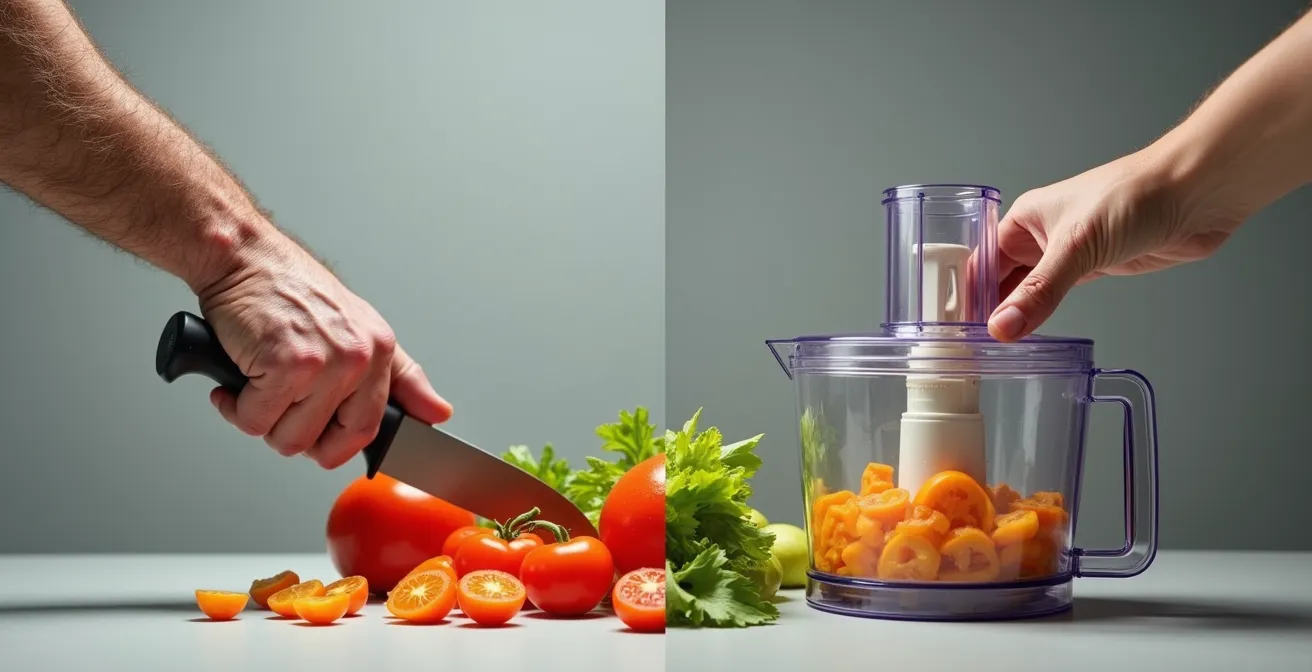
The decision matrix below helps clarify this choice from an occupational therapy perspective. It also includes a pull-cord chopper, a fantastic middle-ground option that offers the containment of a food processor but is quiet, vibration-free, and gives the user more control over the texture of the food. It’s a manual tool that requires minimal grip strength to operate.
| Criteria | Rocker Knife | Food Processor | Pull-Cord Chopper |
|---|---|---|---|
| Tremor Safety | Moderate | High (contained) | High (contained) |
| User Control | High | Low | Moderate |
| Noise Level | Silent | Loud | Quiet |
| Vibration | None | High | None |
| Cleanup Complexity | Simple | Complex | Moderate |
The Cast Iron Mistake That Causes Wrist Fractures
Heavy cookware, particularly cast iron, presents one of the most significant and often overlooked dangers in the kitchen for someone with arthritis. The primary mistake is attempting to lift a heavy, single-handled pot or pan. This action puts immense torque and strain on the wrist, a joint already weakened by arthritis. A moment of weakness or a sudden flare-up of pain can lead to a dropped pot, causing severe burns or, in the worst cases, a wrist fracture from trying to catch it or from the fall itself.
The danger is compounded when individuals try to compensate without the right technique, creating a false sense of security.
Case Study: The Danger of Improvised Lifting
Research into assistive tools highlighted a common, dangerous practice. A study focusing on kitchen safety for RA sufferers noted that because of limited strength, people often had to lift with their forearms. When a pot had only one handle, “most people put a towel over their other forearm to grasp the opposite side of the pot, but this was a slippery and dangerous way of lifting, exposing the person to the risk of burns.” This illustrates how a lack of proper tools and techniques can lead to hazardous workarounds.
The solution lies in a core OT principle: never lift what you can slide. Adapting your technique is more important than the cookware itself. Lighter pans like carbon steel can help, but the strategy is what ensures safety.
Your Action Plan: Safe Heavy Cookware Handling
- Adopt the ‘slide, don’t lift’ method: Slide hot pans from the stove directly onto a nearby cork trivet or cooling rack.
- Use two hands for everything: Even with lighter pots, always use two hands to distribute weight evenly and protect your wrists.
- Bring water to the pot, not the pot to the water: Use a lightweight pitcher to fill pots directly on the stove to avoid carrying heavy, sloshing containers.
- Pre-fill oven pans in place: To fill a water bath, place the empty pan in the cold oven first, then use a measuring cup to fill it before preheating.
- Consider lighter alternatives: If buying new cookware, explore carbon steel or hard-anodized aluminum, which offer good heat distribution with less weight than cast iron.
How to Set Up a “Sit-Down” Prep Station for Long Cooking Sessions?
Standing for long periods to chop, mix, and prepare ingredients is a major source of fatigue. This is where the principle of energy conservation becomes paramount. Creating a dedicated “sit-down” prep station allows you to work comfortably for longer periods, saving your energy for the actual cooking and enjoyment of the meal. This isn’t just about pulling up a chair; it’s about creating an ergonomic and efficient workspace.
The ideal setup uses a counter-height or bar-height stool, which places you at a better working level than a standard dining chair. Your work surface should be about 2-3 inches below your bent elbow to minimize strain on your shoulders and back. From here, you can organize your tools and ingredients into a “Golden Triangle.” This involves placing your cutting board in the center, a scrap bowl on your non-dominant side, and a bowl for prepped ingredients on your dominant side. This arrangement minimizes reaching and twisting, keeping everything within a comfortable arc of motion.
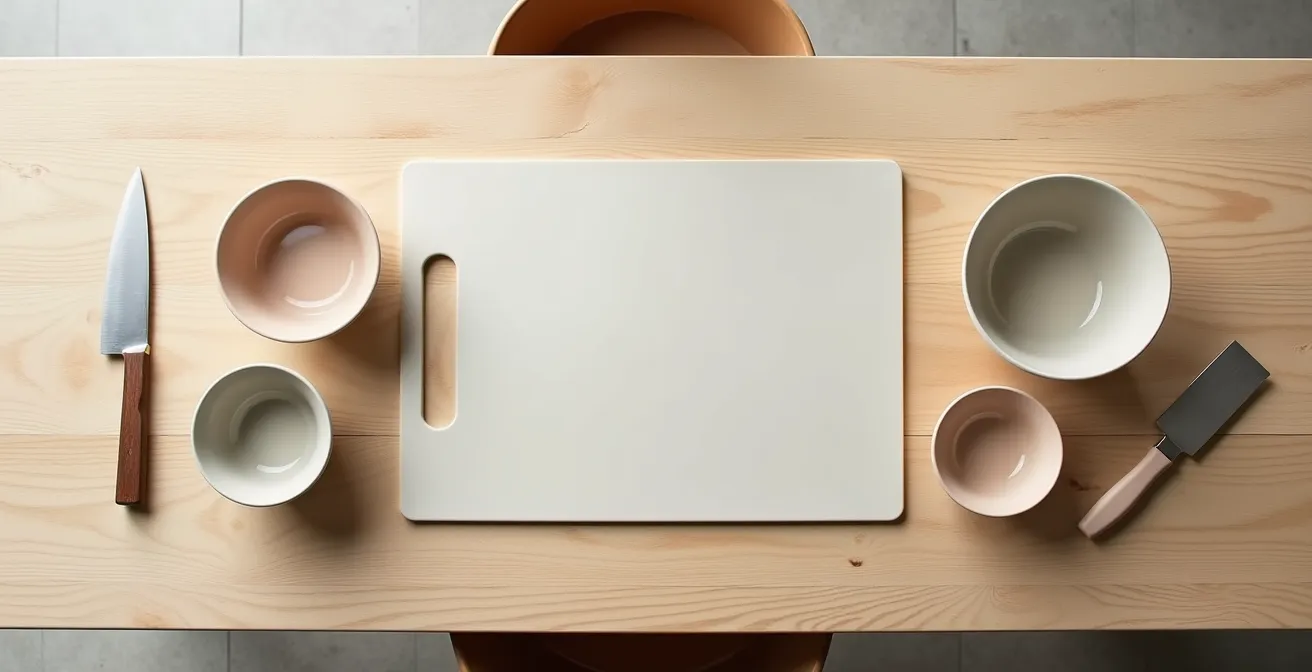
This systematic approach transforms a fatiguing task into a manageable and even meditative process. Using a bench scraper to slide ingredients from the cutting board to the destination bowl further reduces the need to lift and carry, conserving even more energy and protecting your hand and wrist joints. A well-designed seated station is a game-changer, enabling you to tackle more complex recipes without paying for it with pain and exhaustion later.
How to Reduce Walking Distance Between Sink and Stove?
In a kitchen, wasted motion equals wasted energy. The repetitive trips between the sink and the stove—to fill a pot, wash vegetables, or get water for a recipe—can add up, contributing significantly to fatigue, especially for those with limited mobility or stamina. Minimizing this travel is a core strategy in energy conservation. As one patient, Christine, 75, concisely put it in an interview with Versus Arthritis, her day is a constant balance: “I have to do something and sit down for a bit and repeat.” Reducing the “doing” part of that cycle is key.
The most effective method is to bring the water to where you need it, rather than moving heavy pots back and forth. A simple, lightweight water pitcher is an indispensable tool. You can fill it at the sink and carry it to the stove to fill your pots in place. This technique single-handedly eliminates one of the heaviest and most awkward lifting tasks in the kitchen. For rinsing vegetables or other tasks, a small rolling cart can be set up as a mobile rinsing station, with a bowl of clean water and another for discarding.
Implementing a “mise en place” system—the French culinary term for having all your ingredients prepped and organized before you start cooking—is another powerful energy-saver. By gathering and preparing everything you need in one place (ideally at your sit-down prep station), you consolidate your efforts. This eliminates the frantic back-and-forth for a forgotten spice or an unwashed vegetable, turning the cooking process into a calmer, more linear, and far less tiring sequence of events.
How to Fortify Your Soups Without Altering the Taste?
When chopping is difficult and energy is low, soups and stews often become go-to meals. They are forgiving, can be made in batches, and are easy to consume. This presents a unique opportunity to supercharge your nutrition, compensating for any potential dietary limitations. Fortifying these meals is a simple and effective way to boost your intake of protein, fiber, and essential minerals without affecting the flavor you love. It’s a proactive step in breaking the cycle of processed foods mentioned earlier.
The goal is to use “invisible” ingredients that blend in seamlessly. For a protein and joint-support boost, unflavored collagen peptides dissolve completely and have no taste. For added fiber and creaminess, blending a can of rinsed white beans into a soup base is an incredible trick. An immersion blender is a great tool for this, as you can do it right in the pot. This is not just a culinary tip; it’s backed by science. A 2024 NHANES data analysis showed that higher dietary fiber intake was negatively associated with the presence of osteoarthritis.
Other powerful additions include nutritional yeast, which adds a savory, cheesy flavor along with B vitamins, and silken tofu, which can be blended into creamy soups to add a significant protein punch without anyone knowing. Using bone broth as a base instead of water or standard stock also adds a wealth of minerals and collagen. By adopting these simple fortification strategies, you can turn a simple bowl of soup into a nutritional powerhouse that actively supports your joint health and overall well-being.
Key takeaways
- The right tools are those that align with joint protection and energy conservation principles, not just the most popular ones.
- Task modification is key: Change the task to fit your body, such as using a rocker knife or filling pots on the stove.
- An organized, ergonomic workspace (like a seated prep station) is more important than any single gadget for preventing fatigue.
How to Plan a Weekly Menu That Caregivers Can Easily Prepare?
True kitchen independence isn’t always about doing everything yourself. Sometimes, it’s about creating a system that allows others to help you effectively and respectfully. For those days when pain or fatigue is high, having a plan that a caregiver or family member can easily execute is the ultimate energy conservation strategy. The key is a method called “component cooking.”
Instead of planning for distinct, complex meals each day, you plan to pre-prepare individual components that can be quickly assembled. For example, on a good day, you might be able to wash and chop vegetables or measure out spice blends, while a caregiver handles the heavy lifting of a slow cooker pot. The slow cooker itself is a fantastic appliance, allowing for “set it and forget it” meals that require minimal active time. These components—cooked grains, roasted vegetables, pre-portioned proteins, and sauces—can be stored in clear, labeled containers.
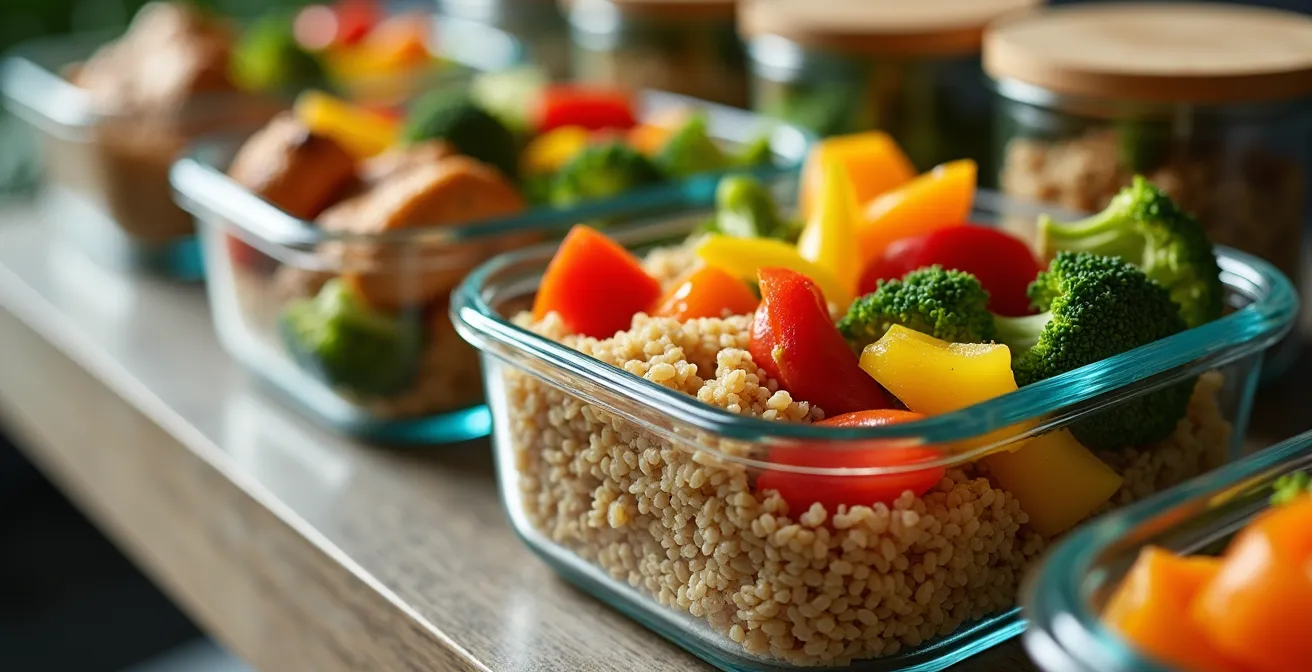
This approach transforms a caregiver’s role. Instead of needing to follow a complex recipe from scratch, their task might be as simple as “Combine container A and B, and heat.” This reduces their time in your kitchen and minimizes the mental load for everyone. Using a shared digital recipe app can synchronize shopping lists and keep everyone on the same page. This collaborative system empowers you to remain the “chef” and director of your meals, even when you’re not doing the physical labor. It’s the highest form of task adaptation—adapting the entire meal-prep ecosystem to support your independence and well-being.
Now that you are equipped with these therapeutic strategies, the next step is to assess your own kitchen and identify one or two changes you can implement this week. Start small—perhaps by getting a pitcher to fill pots on the stove or organizing a single drawer for your most-used ergonomic tools. Each small adaptation is a victory that brings you closer to safer, more joyful cooking.