
The primary risk when installing a grab bar isn’t cracking a tile; it’s a catastrophic failure of the bar under the dynamic force of a fall. This guide moves beyond simple DIY tips to a professional methodology, emphasizing that a grab bar is a life-saving structural device. Success depends on locating and securely anchoring into wall studs, as anything less guarantees failure when it’s needed most.
The thought of drilling into a pristine tiled wall can be intimidating. The fear of a spiderweb crack spreading across an expensive ceramic or porcelain tile is a primary reason many hesitate to install essential safety equipment like grab bars. However, the true danger isn’t a cosmetic flaw. It’s the catastrophic failure of an improperly installed bar during the one moment it’s critically needed. An estimated 235,000 people are injured in bathroom falls annually, and a grab bar that rips out of the wall becomes part of the problem, not the solution.
This guide is not a list of quick tips. It is a technical walkthrough from a contractor’s perspective. We will move beyond the basics of “use a special drill bit” and delve into the structural principles that separate a decorative accessory from a life-saving device. The focus is on understanding the immense dynamic forces at play during a slip and ensuring your installation can handle them. A grab bar isn’t just screwed to a wall; it must become an integral part of the home’s framing. Anything less is a gamble you cannot afford to take.
This article will deconstruct the process, from identifying why common bathroom fixtures are dangerously inadequate to the precise methods for locating structural supports, choosing the right hardware, and positioning the bar for maximum ergonomic effectiveness. Follow this methodology to ensure your installation provides true security, not just the illusion of it.
Summary: A Technical Guide to Safe Grab Bar Installation on Tile
- Why a Towel Rack Cannot Support Your Body Weight During a Fall?
- How to Find Studs Behind Tile for Maximum Weight Capacity?
- Suction Cup Bars or Screw-Mounted: Which Is Truly Safe for Daily Use?
- The Height Mistake That Makes Grab Bars Useless When You Slip
- Where to Position the Bar to Help You Stand Up From the Toilet?
- The DIY Handrail Mistake That Causes Wall Collapse Under Weight
- Why a Full Bathroom Remodel Adds Value While Increasing Safety?
- How to Prioritize Home Modifications on a Fixed Pension Budget?
Why a Towel Rack Cannot Support Your Body Weight During a Fall?
In a moment of instability, the nearest fixed object becomes a target for a desperate grab. Too often, this is a towel rack. This is a critical mistake rooted in a misunderstanding of force. A towel rack is designed to hold a static, light-weight object—a damp towel weighing perhaps five pounds. A grab bar, in contrast, is engineered to arrest the momentum of a falling adult. This is a question of dynamic load versus static capacity.
The core difference lies in the anchoring system and materials. Towel racks are typically mounted with small, inadequate screws into plastic drywall anchors. These anchors have a very low shear strength and are designed only to prevent the screw from pulling straight out of the drywall. They offer almost no resistance to the sudden, downward, and outward force of a person grabbing for support. The failure point is often as low as 50 pounds of force, which is easily exceeded during a fall.
Conversely, a properly installed grab bar is a structural component. The Americans with Disabilities Act (ADA) provides clear, non-negotiable standards for safety. A key specification is that a grab bar must be able to withstand a significant load. In fact, professional-grade bars are tested to handle far more, but the baseline is clear: they are built for emergencies. This strength is achieved not by the bar itself, but by fastening it with heavy-duty structural screws directly into the wooden studs that frame the wall. This transfers the force from the bar, through the tile and drywall, and into the very skeleton of the house, which is why grab bars must withstand 250 lbs without any deformation. A towel rack is a decoration; a grab bar is a piece of safety equipment.
How to Find Studs Behind Tile for Maximum Weight Capacity?
The single most important step in a secure grab bar installation is locating the wall studs. Anchoring into drywall, even with specialized hollow-wall anchors, is unacceptable for a device meant to support body weight under duress. The stud is the only component capable of providing the necessary structural integrity. Finding them behind a layer of tile and backer board requires a methodical, multi-step approach, not guesswork.
A high-quality electronic stud finder with a “deep scan” or “metal scan” mode is your primary tool. This will help you identify density changes behind the wall. However, due to the variable thickness of mortar and tile, these readings can be imprecise. Therefore, you must not rely on a single method. The professional approach is a triple-confirmation method to guarantee you have found the center of a wooden stud before you even think about drilling a large hole.
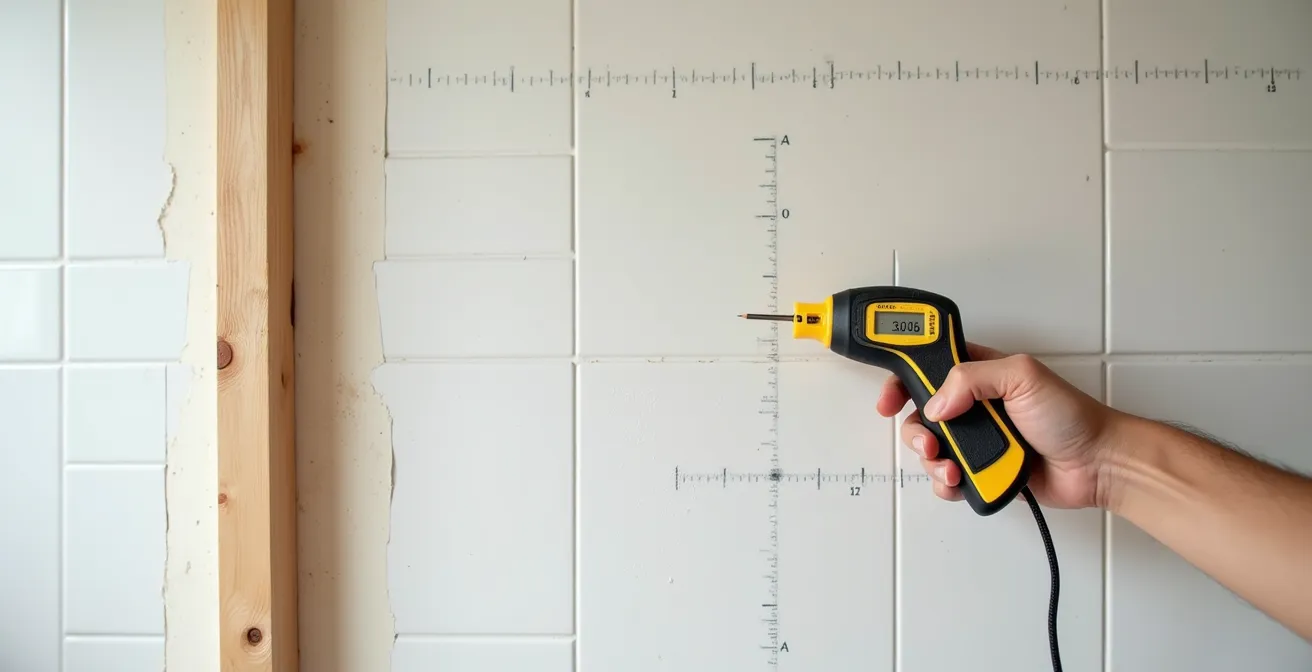
Once you believe you’ve found a stud, you must verify it. Relying on a single tool is a recipe for error. A small test hole is the only way to be 100% certain you are about to drill into solid wood. This is not a step to be skipped or rushed; it is the foundation of the entire installation’s safety.
Your Action Plan: The Triple-Confirmation Method for Stud Location
- Use a high-quality, deep-scan stud finder to get the approximate location of the stud through the tile and backer board.
- Switch to a magnetic stud finder. Slide it over the area to locate the metal drywall screws that fix the backer board to the stud. This confirms the vertical line of the stud.
- Drill a very small 1/8-inch test hole in an adjacent grout line, where it can be easily sealed later. You should feel the resistance of wood after passing through the backer board.
- Mark both edges of the stud using painter’s tape on the tile surface to ensure your final mounting screws are perfectly centered.
- Measure 16 or 24 inches to the left or right to locate the next stud. Wall framing is consistent. This verifies your findings.
Suction Cup Bars or Screw-Mounted: Which Is Truly Safe for Daily Use?
The allure of a suction cup grab bar is powerful: no drilling, no damage, no commitment. They seem to offer a simple solution to a complex problem. However, from a safety and engineering standpoint, these devices are dangerously misleading and should never be trusted for weight-bearing support. They are suitable for one purpose only: temporarily testing potential positions for a real, screw-mounted bar.
The failure of suction cups is not a matter of ‘if’, but ‘when’. Their grip depends on a perfect, non-porous surface and the creation of a vacuum. Tile surfaces, especially those with even a slight texture, or grout lines, compromise this seal. Temperature fluctuations, humidity changes, and soap residue can all cause the seal to degrade slowly and silently over time. The most dangerous aspect is that there is often no warning before a catastrophic failure. The bar feels secure one moment and completely detaches the next, precisely when weight is applied.
Screw-mounted bars are the only acceptable solution for daily safety. As mandated by the ADA, they are designed as a permanent installation. The force applied to the bar is transferred through the mounting hardware directly into the building’s structure. This creates a reliable, predictable, and testable system. While a screw-mounted bar requires a more invasive installation, the result is genuine security. The following table illustrates the stark differences in safety.
The ADA standards are clear in requiring grab bars to withstand a vertical or horizontal force of 250 pounds, a benchmark that suction-mounted options simply cannot meet or guarantee over time, making them non-compliant for any true safety application.
| Feature | Suction Cup Bars | Screw-Mounted Bars |
|---|---|---|
| Weight Capacity | 50 lbs typical failure point | 250+ lbs ADA requirement |
| Installation | No drilling required | Requires drilling into studs |
| Permanence | Temporary, loses grip over time | Permanent installation |
| Safety Warning | Silent failure risk | Visible if loosening |
| Best Use | Testing positions only | Daily safety support |
The Height Mistake That Makes Grab Bars Useless When You Slip
One of the most common installation errors is rigidly adhering to a standard height without considering the specific user and context. While guidelines provide a necessary starting point, the ultimate placement must be determined by ergonomics and intended function. A bar placed at the wrong height is not just suboptimal; it can be completely ineffective in an emergency.
The ADA provides a standard for horizontal bars in accessible bathrooms. This specification is crucial for public accommodations and serves as an excellent baseline for residential installations. However, this is not the end of the conversation. The ideal height for a support bar in a shower for one individual may be different from the height needed for another to assist with standing. For example, a lower bar might be better for preventing a slide-down-the-wall fall, while a higher bar is better for stabilizing while standing and washing.
The most effective method is dynamic ergonomic testing. Before drilling, have the primary user stand in the shower or next to the tub. Ask them to move as they normally would: raising their arms to wash hair, bending to wash feet. Note where their hands naturally go for support. Simulate a controlled loss of balance and see where their hand instinctively reaches. This real-world data is far more valuable than a number in a manual. The standard height is a rule, and a professional knows when to adapt it for the user’s specific needs, ensuring the bar is exactly where the hand needs to be in that critical split-second. The standard height of 33 to 36 inches above the finished floor is the starting point, not the final answer.
Where to Position the Bar to Help You Stand Up From the Toilet?
Assisting with transfers to and from the toilet is one of the most critical functions of a residential grab bar. The biomechanics of this movement—lowering the body under control and then rising from a low, seated position—are complex and place significant stress on the knees and back. A properly positioned grab bar can make this daily task safer and preserve independence. However, incorrect placement can be useless or even create an awkward, unsafe twisting motion.
The goal is to provide a leverage point that allows the user to use their arm and shoulder strength to assist their legs. This typically involves both a pushing and a pulling motion. A single horizontal bar placed on the side wall is a common solution. It should be long enough to allow for a handhold both when seated and during the process of standing. An additional vertical bar placed on the wall in front of the user can also be extremely helpful for pulling oneself forward and up.
The ideal placement is highly dependent on the bathroom layout and the user’s specific physical needs and strength. For example, a user with weakness on one side of their body will need the primary support on their stronger side. The key is to position the bar where the user can maintain a neutral wrist position and use their larger muscle groups (biceps, back) to pull, and their triceps to push. Again, testing with the user before final installation is paramount. Have them simulate the motion and indicate where their hand most comfortably and powerfully lands.
The DIY Handrail Mistake That Causes Wall Collapse Under Weight
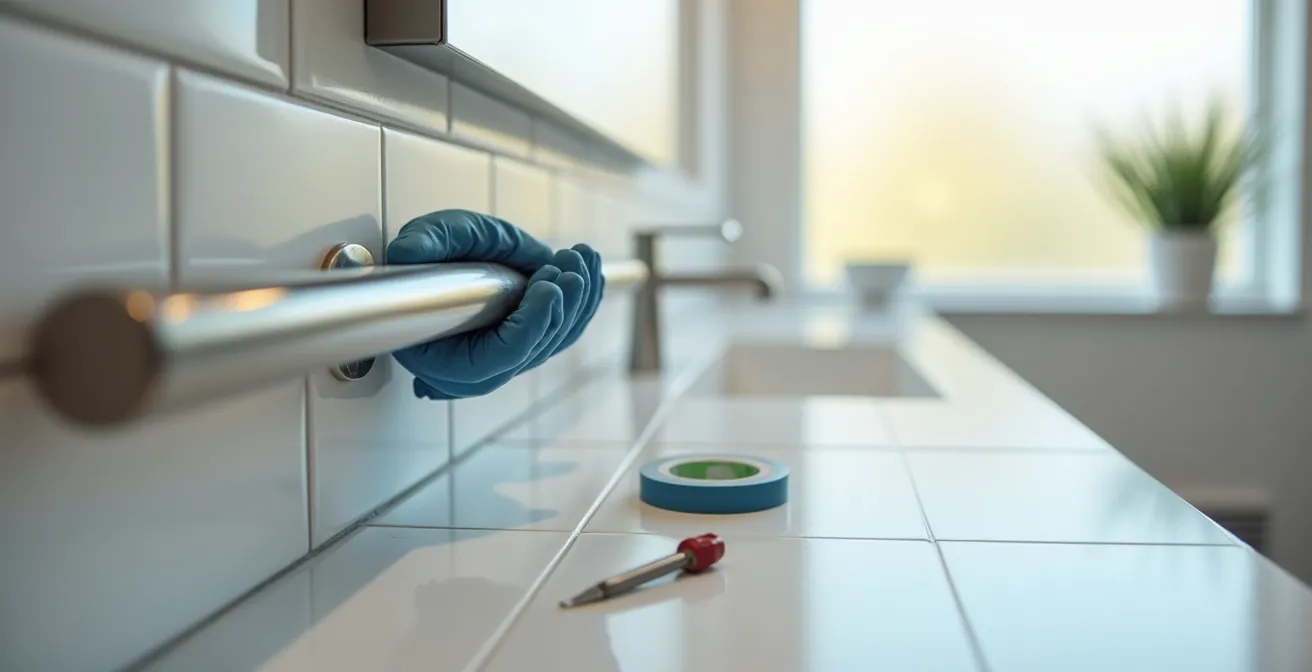
While the focus is often on the grab bar itself, the installation’s true strength comes from the correct use of hardware and techniques. A high-quality, ADA-compliant bar becomes worthless if it’s attached to the wall with the wrong fasteners or if the wall’s integrity is compromised. Many well-intentioned DIY installations fail not because the stud wasn’t found, but because of critical mistakes in the final attachment process.
The most common and dangerous mistake is using the wrong screws. Standard drywall screws are brittle and designed for a completely different purpose; they will snap under the shear stress of a dynamic load. A grab bar must be installed with structural lag screws that are long enough to penetrate at least 1 inch into the solid wood of the stud. This creates a connection that can withstand the immense forces involved.
Another critical error is failing to properly seal the mounting points. Any hole drilled through tile in a wet area like a shower is a potential entry point for water. If the mounting flange of the grab bar is not sealed with a high-quality silicone sealant, water will inevitably find its way behind the wall. Over time, this leads to rot in the wooden studs, destroying the very structural support the bar relies on. This creates a hidden danger: the bar feels solid, but the wood it’s screwed into is slowly turning to mush, setting the stage for a complete wall collapse under weight.
Your Action Plan: Critical Installation Safety Checklist
- Never rely on drywall anchors alone for a grab bar. Always secure it directly into wooden studs.
- Use heavy-duty stainless steel structural lag screws, not common drywall or wood screws.
- Apply a bead of 100% silicone sealant around the drill holes and behind the mounting flanges before tightening to create a waterproof seal.
- Ensure your lag screws have a minimum of 1-inch penetration into the wooden stud, after accounting for tile and backer board thickness.
- After installation, test the bar with your full body weight, applying force from different angles to confirm its absolute stability before it is used.
Key Takeaways
- A grab bar is a structural safety device, not a bathroom accessory; it must anchor into wall studs.
- Suction cup bars are not safe for weight support due to the high risk of silent, catastrophic failure.
- Correct placement is ergonomic: ADA height standards are a starting point, but the bar must be positioned for the specific user’s needs.
Why a Full Bathroom Remodel Adds Value While Increasing Safety?
While installing individual grab bars is a crucial safety intervention, sometimes the most effective approach is a comprehensive one. A full bathroom remodel, planned with universal design principles in mind, can transform a hazardous space into a safe, comfortable, and accessible environment. This not only dramatically increases safety but also adds significant long-term value to the home. A 2020 U.S. Census Bureau report found that a shockingly low 10% of U.S. homes have the key features needed to accommodate older populations, such as handrails or built-in shower seats, highlighting a major gap in housing readiness.
One of the key advantages of a remodel is the opportunity to install proactive blocking. This involves opening the walls and adding horizontal wooden blocks between the studs at predetermined heights. Once the walls are closed and tiled, you have solid wood anchoring points everywhere you might ever want to install a grab bar, now or in the future. This eliminates the constraint of having to align grab bars with the existing 16-inch or 24-inch stud spacing.
Beyond blocking, a remodel allows for the integration of other critical safety features that work in concert with grab bars. A zero-threshold or “curbless” shower eliminates the single biggest trip hazard in a bathroom. Anti-slip flooring provides better traction, even when wet. Wider doorways accommodate walkers or wheelchairs, and improved lighting reduces the risk of missteps. These features create a layered safety system and are highly attractive to a growing market of buyers looking for homes they can age in place in, providing a tangible return on investment.
| Feature | Average Cost | Value Added | Safety Impact |
|---|---|---|---|
| Proactive Blocking Installation | $200-400 | Future-proofs bathroom | Enables grab bar installation anywhere |
| Zero-Threshold Shower | $2,500-5,000 | Appeals to aging-in-place market | Eliminates trip hazard |
| Wider Doorways (36 inches) | $500-1,000 | Increases accessibility | Accommodates walkers/wheelchairs |
| Anti-Slip Flooring | $1,000-2,000 | Reduces insurance liability | Prevents slip-and-fall accidents |
How to Prioritize Home Modifications on a Fixed Pension Budget?
For many seniors on a fixed income, the idea of a full bathroom remodel, or even multiple safety installations, can seem financially overwhelming. However, it’s essential to reframe this cost not as an expense, but as a critical investment in preventing a far greater financial and personal catastrophe. The cost of inaction is exponentially higher than the cost of proactive safety measures.
The financial argument is stark. According to an analysis from the National Council on Aging (NCOA), a fall can be financially devastating. A simple, professionally installed grab bar might cost a few hundred dollars. In contrast, the medical costs associated with a serious fall can run into the tens of thousands, completely depleting savings and derailing a retirement plan. When viewed through this lens, a grab bar is one of the highest-return investments a senior can make in their own well-being. A fall-related hospitalization can cost over $18,000 on average, whereas a preventative grab bar installation typically costs between $200 and $500.
With a limited budget, prioritization is key. Not all modifications have the same impact. The goal should be to address the highest-risk areas first, implementing a phased approach to safety upgrades. Start with the modifications that prevent the most common and most dangerous falls. A strategic timeline allows for manageable, incremental investments that build upon each other to create a progressively safer home environment over time, without requiring a large, one-time outlay of cash.
Now that you are equipped with the technical knowledge to distinguish a safe installation from a dangerous one, the next step is to honestly assess your own skills and tools. The logical conclusion is to decide whether to undertake this critical task with the required precision or to entrust your safety to a qualified professional.