

In summary:
- Shift your focus from the three-month A1C average to daily Time in Range (TIR) for a true picture of your glucose control.
- Master the art of interpreting trend arrows to understand glucose “momentum,” allowing for small, proactive adjustments instead of reactive crisis management.
- Recognize and troubleshoot common CGM errors, such as “compression lows” during sleep, to ensure data accuracy and avoid alarm fatigue.
- Use your CGM as an investigative tool to learn how specific foods, even “sugar-free” ones, uniquely impact your body.
- Customize your high and low alerts for different times of day to make your CGM a helpful partner, not a constant nuisance.
For many seniors managing diabetes, transitioning from the familiar ritual of finger pricks to a Continuous Glucose Monitor (CGM) can feel like learning a new language. The old method gave you a single, static number. A CGM, however, provides a constant stream of information, complete with trend arrows that can seem confusing or even alarming at first. The common advice is to simply react when an arrow points down, but this approach misses the true power of the technology.
The real breakthrough isn’t just seeing your glucose level in real-time; it’s understanding its direction and, more importantly, its momentum. Interpreting these trend arrows is less about responding to an alarm and more about becoming a forecaster for your own body. It’s the difference between slamming on the brakes to avoid an obstacle and seeing the road ahead clearly enough to gently tap them long before you’re in danger.
This guide moves beyond the basics of “what the arrows mean.” We will explore how to read the narrative of your glucose trends, make proactive micro-adjustments, and customize the technology to fit your life. By the end, you will have the confidence to use your CGM not just as a report card, but as a predictive navigation system to prevent hypoglycemia and gain true control.
To help you master this technology, this article breaks down the essential skills and knowledge you need. We’ll cover everything from the foundational concepts of glucose monitoring to advanced tips for personalizing your device and lifestyle.
Summary: A Senior’s Guide to Mastering CGM Technology
- Why “Time in Range” Matters More Than Your A1C Score?
- How to Apply a CGM Sensor so It Doesn’t Fall Off in the Shower?
- Flash Scanning or Bluetooth Streaming: Which System Suits Your Lifestyle?
- The “Nighttime Alarm” Error caused by Sleeping on Your Sensor
- How to Customize High/Low Alerts to Avoid Alarm Fatigue?
- Why “Sugar-Free” Cookies Can Still Spike Your Glucose Levels?
- Wearables or Bed Sensors: What Is Best for Sleep Apnea Detection?
- How to Meal Prep for a Low-Sodium Diet Without Losing Flavor?
Why “Time in Range” Matters More Than Your A1C Score?
For decades, the A1C test has been the gold standard for measuring diabetes control. It provides a three-month average of your blood sugar, which is useful but can be dangerously misleading. An A1C of 7% might seem ideal, but it tells you nothing about the journey to that average. It could represent stable glucose levels, or it could be the result of a volatile rollercoaster of severe highs and dangerous lows. This is where the concept of Time in Range (TIR), a metric only a CGM can provide, becomes revolutionary.
TIR measures the percentage of time you spend within your target glucose range (typically 70-180 mg/dL or 3.9-10.0 mmol/L). It reveals the glucose variability that A1C hides. Two people can have the same A1C of 7%, but one might have a TIR of 75% (very good control) while the other has a TIR of 45% with frequent, risky hypoglycemic events. Focusing on increasing your TIR is a more direct way to improve health outcomes and reduce complication risks. In fact, research shows a strong correlation where every 10% increase in TIR corresponds to an approximate 0.8% decrease in A1C, but with the added benefit of knowing you are avoiding dangerous fluctuations.
This table illustrates why an A1C score alone is an incomplete picture of your metabolic health and can easily hide the risk of hypoglycemia that TIR makes visible.
| Metric | A1C of 7% | TIR Information |
|---|---|---|
| Average Glucose | 154 mg/dL (8.5 mmol/L) | Same average possible |
| Hypoglycemia Detection | Cannot detect | Shows exact time below 70 mg/dL |
| Glucose Variability | Hidden | Reveals highs, lows, and stability patterns |
| Real-time Actionability | 3-month retrospective | Daily/weekly adjustments possible |
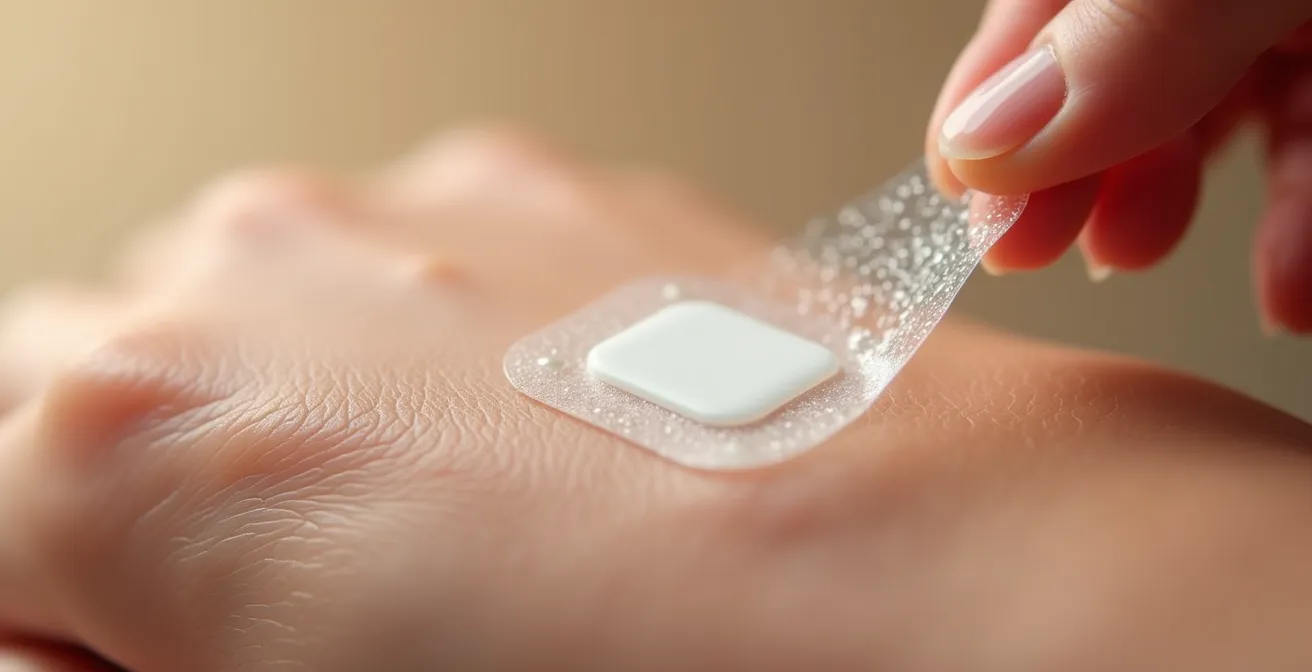
How to Apply a CGM Sensor so It Doesn’t Fall Off in the Shower?
A CGM sensor is only as good as its connection to your body. A common frustration for new users, especially seniors, is a sensor that peels off prematurely after a shower or during daily activities. This not only wastes a costly sensor but also creates gaps in your crucial glucose data. The key to a secure, long-lasting application lies in meticulous skin preparation. It’s a few extra minutes of effort that can guarantee 10 to 14 days of reliable readings.
The goal is to create a clean, dry, and stable surface for the adhesive to bond with. Oils, lotions, and even dead skin cells can interfere with this bond. For seniors who may have more delicate or dry skin, proper prep is even more critical. Additionally, choosing the right location is half the battle. Sites with less movement and friction, like the back of the upper arm or the upper buttocks, are often more successful than the abdomen for active individuals.
Follow these steps for a waterproof and secure application:
- Gently exfoliate the application area 24 hours before sensor placement. This removes dead skin cells that can cause the patch to lift. A simple washcloth is sufficient.
- Clean the chosen area with an alcohol wipe and let it air dry completely. This can take up to 60 seconds. Do not blow on it, as this can introduce bacteria. The surface must be bone-dry.
- Consider a skin barrier wipe (like Skin-Tac™). Apply it in a “donut” shape, leaving a clear circle in the middle where the sensor’s cannula will be inserted. This adds an extra layer of adhesion without interfering with the sensor.
- Use a stable surface for application. For seniors with limited dexterity or stability, pressing the applicator against a tabletop or counter can provide the leverage needed for a smooth, even insertion.
- Apply a waterproof overpatch. Most CGM manufacturers offer complimentary overpatches designed to go over the sensor, providing a secondary shield against water and friction.
This technique, combining skin prep with a physical barrier, creates a robust defense against moisture and movement. It transforms the sensor from a delicate piece of technology into a durable part of your daily life, giving you the confidence to shower, swim, and stay active without worry.
Flash Scanning or Bluetooth Streaming: Which System Suits Your Lifestyle?
When choosing a CGM, one of the most significant decisions is between a “flash” system (like the Freestyle Libre) and a real-time “streaming” system (like Dexcom or Medtronic). A flash system requires you to intentionally scan the sensor with a reader or smartphone to get a glucose reading. A streaming system automatically sends data via Bluetooth to your device every few minutes. The best choice depends entirely on your personality and how you want to interact with your health data.
A flash system puts you in the driver’s seat. You only see your data when you choose to. This can be a major advantage for individuals who feel anxious or overwhelmed by constant information. It prevents “alarm fatigue” and encourages a more mindful check-in process. However, its major drawback is that it won’t automatically alert you to a sudden drop or rise, meaning you could miss a hypoglycemic event, especially during sleep.
A Bluetooth streaming system acts as a vigilant co-pilot. It provides a constant data feed and, crucially, automated high and low alerts. For seniors, especially those living alone or prone to hypoglycemia, these automated alarms can be a literal lifesaver. The downside is the potential for information overload and alarm fatigue. Constant alerts can lead to anxiety and a temptation to “over-correct” small fluctuations. This is particularly relevant given expert guidance on managing diabetes in older adults. As the Endocrine Society states:
For fragile or older adults, the Endocrine Society recommends a less aggressive insulin dose adjustment to limit the risk of hypoglycemia
– Endocrine Society Guidelines, Journal of the Endocrine Society
A streaming system’s constant data might tempt users into making too many small, aggressive adjustments, which is exactly what these guidelines caution against. Therefore, choosing a system is a balance: do you prefer the proactive safety net of streaming alerts, or the psychological calm and control of on-demand flash scanning?
The “Nighttime Alarm” Error caused by Sleeping on Your Sensor
One of the most jarring experiences for a new CGM user is being woken up by an urgent low alarm, only to do a finger prick and find their glucose level is perfectly normal. This common phenomenon is known as a “compression low.” It’s a false alarm caused by putting pressure on the sensor, typically by sleeping on it. The pressure restricts blood flow and affects the interstitial fluid where the sensor measures glucose, temporarily tricking it into reporting a much lower value than is actually present.
These false alarms are not just an annoyance; they can erode trust in the technology and lead to dangerous behaviors. A user might start ignoring or silencing alarms, potentially missing a true hypoglycemic event. Or, they might “treat” the false low with carbohydrates they don’t need, leading to hyperglycemia. Understanding that compression lows are a mechanical issue, not a metabolic one, is key to managing them.
The solution is almost always related to sensor placement and sleeping strategy. By consciously placing the sensor away from the areas you put pressure on, you can dramatically reduce the frequency of these false alarms. This is a perfect example of learning to work *with* the technology’s limitations.
Case Study: Sensor Placement Strategy for Different Sleep Positions
Clinical observations show that a patient’s sleep habits are the best predictor of compression lows. Side-sleepers benefit most from placing sensors on the back of the upper arm of the side they *don’t* sleep on. Back-sleepers often find success with abdominal placement, at least two inches away from the navel. For those who toss and turn, a simple but effective strategy is the “pillow barrier” technique—placing a body pillow behind them to prevent rolling onto the sensor. In a survey of 200 CGM users, this technique alone was found to have reduced false low alarms by 60%, significantly improving sleep quality and trust in their CGM data.
By identifying your sleep patterns and adjusting your sensor site accordingly, you can reclaim your nights and ensure your CGM alarms are reserved for true metabolic events, not simple pressure artifacts.
How to Customize High/Low Alerts to Avoid Alarm Fatigue?
A brand-new CGM with default settings can feel like having a smoke detector that goes off every time you make toast. The constant beeping for minor fluctuations can quickly lead to “alarm fatigue,” a state of exhaustion where you become desensitized and start ignoring the very alerts designed to protect you. The key to making a CGM a helpful partner rather than a nagging pest is to customize its alerts to match your daily rhythms and personal glucose patterns.
Most CGM systems allow you to set different alert thresholds for different times of day. This is a powerful feature that many users overlook. Your glucose needs and risks are not the same when you’re sleeping, exercising, or sitting at a desk. A low alert set at 70 mg/dL might be perfect during the day, but at night, a higher threshold of 90 mg/dL could give you more time to react before you enter a dangerous low while you are less aware. This is about being proactive, not reactive.
Furthermore, some of the most valuable alerts are not the static “low” or “high” warnings, but the rate-of-change alerts. An alert for “Falling Fast” when your glucose is still at a safe 120 mg/dL is far more useful than waiting for it to cross the 70 mg/dL threshold. It gives you a crucial head start to intervene calmly with a small snack, preventing the low altogether. Here is a sample tiered strategy:
- Night Settings (e.g., 10 pm-6 am): Set your low alert slightly higher (e.g., 80-90 mg/dL) to provide an earlier warning and more reaction time while you’re asleep.
- Day Settings (e.g., 6 am-10 pm): A standard low alert (e.g., 70-80 mg/dL) is usually appropriate during normal activity.
- Exercise Mode: Before physical activity, consider temporarily raising your low alert threshold (e.g., 100 mg/dL) to preemptively manage exercise-induced hypoglycemia.
- Enable Rate-of-Change Alerts: Activate the “Falling Fast” or “Rising Fast” alarms. These are your best predictive tools.
- Protect the Urgent Low: Always keep the “Urgent Low” alert (typically around 55 mg/dL) as a non-silenceable, critical safety alarm.
Why “Sugar-Free” Cookies Can Still Spike Your Glucose Levels?
One of the biggest “aha!” moments for new CGM users comes from the food detective work it enables. You might eat a “sugar-free” or “diabetic-friendly” cookie, expecting a minimal impact, only to see your glucose trend arrow begin a slow, persistent climb hours later. This experience can be confusing and frustrating, making you feel like your body isn’t playing by the rules. The truth is, it is—you just couldn’t see the whole game before.
The culprit is often not sugar itself, but two other factors: sugar alcohols and fat content. Many sugar-free products use sugar alcohols like maltitol or sorbitol as sweeteners. While they have fewer calories and are digested more slowly than regular sugar, they are not “free” of impact. Your body does eventually convert them to glucose, causing a delayed rise. Furthermore, high-fat content in baked goods slows down digestion, meaning the carbohydrates (from flour, for instance) hit your bloodstream much later than you’d expect. A single finger prick two hours after eating might miss the spike entirely, but a CGM tells the full story.
Case Study: CGM Reveals the Hidden Impact of Sugar Alcohols
A study monitoring 50 individuals with diabetes provided a clear picture of this phenomenon. Patients who consumed “sugar-free” products containing maltitol saw significant glucose rises 3 to 5 hours after eating. The CGM trend arrows showed a characteristic delayed but prolonged upward curve. The peak glucose levels reached were often similar to those caused by 75% of the equivalent amount of regular sugar. This demonstrated the CGM’s powerful “lie detector” capability, revealing the metabolic truth that single-point testing completely missed.
This is where your CGM becomes a personal science lab. By systematically testing foods and observing the trend arrows, you can build a food database that is 100% personalized to your unique metabolism, moving beyond misleading labels.
Your Action Plan: Auditing Personal Food Responses
- Test item identification: Start by listing 3-5 specific foods, especially “sugar-free” or “keto” products, that you are curious about.
- Baseline data collection: Before testing, on an empty stomach, note your starting glucose level and trend arrow. This is your control variable.
- Consistency check: Eat a standard portion of one test item. For the next 4 hours, avoid other foods and document the trend arrow’s direction and speed every 30 minutes.
- Pattern recognition: Analyze the data. Did the food cause a rapid spike, a slow climb, or no change? Note the time to peak and the time to return to baseline. This reveals the food’s unique “glucose signature.”
- Meal plan integration: Based on your findings, decide where this food fits in your diet. Is it a “safe” snack, or one that requires a pre-emptive insulin dose or follow-up physical activity? Update your personal meal plan accordingly.
Wearables or Bed Sensors: What Is Best for Sleep Apnea Detection?
While a CGM’s primary function is to monitor glucose, its continuous data stream can sometimes reveal clues about other underlying health conditions, including sleep disorders like obstructive sleep apnea (OSA). A common complaint among people with diabetes is waking up with inexplicably high morning blood sugar—the “Dawn Phenomenon.” However, a CGM can help differentiate this from a more concerning pattern caused by a sleep disorder.
In a person with OSA, breathing repeatedly stops and starts during sleep. Each time breathing stops, the body releases a surge of stress hormones, like cortisol, to wake the person up just enough to resume breathing. This hormonal surge also signals the liver to release stored glucose. When this happens dozens or even hundreds of times a night, the effect on a CGM graph is a distinctively “jagged” or “saw-tooth” pattern of many small, repeated spikes throughout the night. This looks very different from the smooth, single-hump curve of a typical Dawn Phenomenon.
Observing this pattern doesn’t diagnose sleep apnea, but it is a powerful piece of evidence to bring to your doctor. The link is so significant that researchers are actively studying it. A 2025 study tracking over 6,000 patients found that 31.3% of diabetes patients show jagged overnight CGM patterns that could indicate potential undiagnosed sleep disorders. This highlights the CGM’s role as a valuable screening tool.
Repeated small glucose spikes overnight, caused by cortisol releases during apnea events, create a distinctively ‘jagged’ CGM trend that differs from a smooth Dawn Phenomenon curve.
– Dr. J. Cai et al., Diabetes, Obesity and Metabolism Journal
If your overnight CGM trends consistently show this jagged pattern, especially alongside symptoms like snoring, daytime sleepiness, or morning headaches, it’s a strong reason to discuss a formal sleep study with your healthcare provider. Treating sleep apnea can not only improve your sleep quality and heart health but may also dramatically improve your glucose control.
Key Takeaways
- Your A1C is an average; your Time in Range (TIR) is the reality. Prioritize increasing TIR to reduce health risks.
- Mastering trend arrows means understanding “glucose momentum” to act proactively with small adjustments, not reactively to alarms.
- Common errors like “compression lows” are mechanical, not metabolic. Solve them with better sensor placement to maintain trust in your device.
- Use your CGM as a personal food lab to uncover the true impact of “diabetic-friendly” foods and build a diet that works for your unique body.
How to Meal Prep for a Low-Sodium Diet Without Losing Flavor?
It may come as a surprise, but what you eat can affect not just your glucose levels, but the accuracy of your CGM itself. Specifically, a diet high in sodium can contribute to dehydration. Since CGM sensors measure glucose in the interstitial fluid—the fluid surrounding your cells—and not directly in the blood, your hydration status can impact the readings. Dehydration can concentrate this fluid, potentially leading to less reliable or slightly delayed sensor readings.
This connection underscores the holistic nature of diabetes management. A heart-healthy, low-sodium diet isn’t just good for your blood pressure; it can contribute to more stable and accurate CGM data. One clinical trial found a direct link: in the ORACL trial, older adults who actively reduced their sodium intake not only improved their hydration but also showed an 8% improvement in time-in-range consistency. This suggests that good hydration supports more reliable sensor performance.
The challenge for many, however, is that “low sodium” often sounds like “low flavor.” The good news is that you can build incredible flavor without relying on salt by using a technique called “flavor stacking.” This involves layering different categories of ingredients that hit different taste receptors, creating a complex and satisfying meal. A meal that is both low-sodium and CGM-friendly (balanced in macronutrients) is the ultimate goal for stable glucose control.
You can create delicious, low-sodium meals using this framework:
- Layer 1 – Aromatics: Start your cooking with a base of garlic, onion, ginger, or scallions. These build a deep, savory foundation with virtually no impact on glucose.
- Layer 2 – Spices: Use dry spices like smoked paprika, cumin, coriander, and turmeric to add warmth and complexity.
- Layer 3 – Fresh Herbs: Incorporate fresh herbs like basil, cilantro, parsley, or rosemary near the end of cooking to add bright, fresh notes.
- Layer 4 – Acids: Finish your dish with a splash of lemon juice, lime juice, or a high-quality vinegar. Acid brightens all the other flavors and mimics the “kick” that salt often provides.
By using this flavor-stacking approach, you can create meals that are both delicious and supportive of both your glucose management and your CGM’s accuracy.
By embracing these strategies, you can transform your CGM from a simple monitoring device into a powerful tool for proactive health management. The next logical step is to discuss these concepts—TIR, personalized alerts, and food testing—with your diabetes care team to build a plan that works for you.