
In summary:
- Immobility from a leg cast quickly leads to muscle loss and joint stiffness, complicating recovery.
- Proactive recovery involves more than just resting; it requires specific micro-movements and proper positioning.
- Safe mobility is achieved by preventing re-injury through careful self-monitoring and a gradual return to activity.
- Managing non-medical aspects, like financial planning for surgery, is a key part of a stress-free recovery.
The sudden halt that a leg fracture or surgery imposes on your life is profoundly disruptive. Your home, once a place of comfort, transforms into an obstacle course. The initial advice is always the same: rest, elevate, and don’t get the cast wet. While this is sound, it’s also incomplete. It positions recovery as a passive waiting game, which can be a dangerous misconception for seniors. The period of immobilization, even for a few days, can trigger a cascade of secondary problems that are often harder to recover from than the initial injury itself.
The truth is, a safe and successful recovery isn’t about doing nothing. It’s about proactive recovery management. This means understanding the hidden risks of inactivity and taking precise, controlled actions to counteract them from day one. The biggest mistake is thinking that “rest” means complete stillness. This approach often leads to significant muscle atrophy, debilitating joint stiffness, and a much longer, more difficult rehabilitation period. A truly effective recovery plan must address these issues head-on.
But if the key isn’t simply waiting, what should you be doing? The answer lies in mastering a series of small but critical tasks. This guide moves beyond the obvious to provide a careful, step-by-step framework for managing your recovery. We will cover why muscle loss happens so fast, how to elevate your leg without straining your back, how to manage sleep, and how to recognize the signs of doing “too much, too soon.” We will also delve into the often-overlooked financial and practical steps, ensuring your recovery is as smooth and stress-free as possible.
This article provides a structured path to navigate your recovery with confidence. The following sections break down each critical aspect, offering clear, actionable advice to help you maintain strength, manage discomfort, and safely return to your daily life.
Contents: How to Safely Navigate Recovery with a Leg Cast
- Why You Lose Muscle Mass After Just 3 Days of Bed Rest?
- How to Elevate Your Leg Above Heart Level Without Back Strain?
- Fiberglass Cast or Walking Boot: Which Is Easier for Sleeping?
- The “Too Soon” Mistake That Causes Re-Injury
- When to Start Massaging Your Incision to Prevent Stiffness?
- The “Resting Too Much” Trap That Worsens Joint Stiffness
- The Surprise Bill Mistake During Scheduled Surgery
- How to Wean Off Your Walker After Hip Surgery?
Why You Lose Muscle Mass After Just 3 Days of Bed Rest?
One of the most immediate and concerning effects of immobilization is muscle atrophy. You may be surprised to learn how quickly your body begins to break down unused muscle tissue. It’s not a matter of weeks; it’s a matter of days. This rapid decline is a primary reason why physical therapy can feel so challenging after a cast is removed. The principle is simple: “use it or lose it.” When muscles are not contracting against resistance, the body interprets this as a signal that they are not needed, and it begins to conserve energy by reducing their mass.
The science backs this up with alarming speed. For instance, research from The Journal of Physiology shows a 6.7% muscle volume loss after just seven days of leg immobilization. This loss primarily affects the powerful muscles in your thigh (quadriceps) and calf, which are essential for stability and walking. For seniors, preserving this muscle mass is not just about strength; it’s about maintaining independence and preventing falls during and after recovery.
Fortunately, you can fight back against this atrophy with controlled micro-movements known as isometric exercises. These are contractions of the muscle without moving the joint, making them safe to perform even within a cast. As confirmed by physical therapists, these small actions send signals to your body to maintain muscle pathways. The most effective exercises include:
- Quad Sets: While sitting or lying down, tighten the large muscle on the front of your thigh as if you are trying to press the back of your knee downward. Hold the contraction for 5 seconds, then relax.
- Glute Squeezes: Squeeze your buttock muscles together tightly. Hold for 5 seconds, then release. This helps maintain the stability of your hip and pelvis.
- Opposite Leg Training: Vigorously exercising your non-injured leg has been shown to have a cross-over effect, helping to preserve some muscle mass in the immobilized leg.
Integrating these simple exercises into your daily routine, performing them for a few minutes every hour you are awake, is the most powerful tool you have to emerge from your cast with the strength you need for a swift recovery.
How to Elevate Your Leg Above Heart Level Without Back Strain?
“Elevate your leg” is perhaps the most common piece of advice given after an injury, and for good reason. Proper elevation uses gravity to help drain fluid away from the injury site, which is critical for reducing swelling, managing pain, and promoting healing. However, the instruction is often given without a crucial second part: how to do it correctly without causing a new problem, namely significant lower back strain. Many patients, in their effort to get their foot high enough, end up creating an uncomfortable and unsustainable arch in their lower back.
The goal is to have your injured foot and ankle positioned comfortably higher than the level of your heart. Simply propping your foot on a single pillow on the couch is rarely sufficient and often leads to awkward, straining positions. The key is to create a gradual, supportive ramp for your entire leg, not just your foot.

As you can see in the diagram, the ideal setup involves a system of support. A foam wedge pillow is the gold standard, as it provides a consistent and stable angle. If you don’t have one, you can replicate this by stacking firm pillows to create a gentle incline that supports your leg from the thigh down to the heel. Crucially, your knee should be slightly bent, not locked straight. To prevent back strain, place a small, rolled-up towel or a slim pillow under your lower back to maintain its natural curve. This tiny adjustment can make the difference between minutes of discomfort and hours of effective, pain-free elevation.
Remember to change your position slightly every hour or so to avoid pressure sores, and ensure your heel is “floating” off the surface of the last pillow to protect it from excessive pressure. This careful positioning is a cornerstone of effective early-stage recovery.
Fiberglass Cast or Walking Boot: Which Is Easier for Sleeping?
Getting comfortable enough to sleep is one of the biggest challenges in the first few weeks of recovery. The cast or boot feels foreign, bulky, and heavy, making it difficult to find a restful position. Whether you have a traditional fiberglass cast or a removable walking boot can significantly impact your nighttime comfort. While a fiberglass cast is lighter and less bulky, a walking boot offers adjustability that can be a major advantage for sleep.
Patients often report that the rigid, unchangeable nature of a cast is its biggest drawback at night. Its rough surface can catch on sheets and irritate the skin on your other leg. A simple but effective solution is to pull a long, soft sock over the entire cast to create a smoother surface. For walking boots, the key advantage is the ability to loosen the straps. With your physician’s approval, slightly reducing the pressure at night can provide immense relief and improve circulation, as long as the foot remains securely positioned.
The choice between the two often comes down to a trade-off between weight and adjustability. The following table breaks down the key differences for sleep comfort:
| Factor | Fiberglass Cast | Walking Boot | Winner |
|---|---|---|---|
| Weight | Lighter (1-2 lbs) | Heavier (3-5 lbs) | Fiberglass |
| Heat Retention | Moderate ventilation | Can be loosened | Walking Boot |
| Bulkiness | Slim profile | Bulky design | Fiberglass |
| Adjustability | Fixed | Straps can be adjusted | Walking Boot |
Regardless of the type, strategic pillow placement is essential. When sleeping on your back, keep the leg elevated on a supportive pillow ramp. If you are a side sleeper, place a firm pillow between your knees and lower legs. This prevents your injured leg from twisting or dropping, which protects your hip and back from strain and keeps your healing limb in a neutral, protected position throughout the night.
Prioritizing sleep is not an indulgence; it is when your body does its most important healing work. Taking the time to create a comfortable and supportive sleep environment is a critical investment in your recovery.
The “Too Soon” Mistake That Causes Re-Injury
As you start to feel better, a natural and powerful urge to “get back to normal” will emerge. This is a positive sign, but it also marks a dangerous phase in your recovery. The “too soon” mistake—pushing your body past its healing limits—is one of the most common causes of setbacks, including re-injury, increased pain, and prolonged swelling. Your bone and soft tissues heal on a biological clock, not your personal schedule, and it’s vital to respect that timeline.
Pain is your body’s primary feedback system. It’s crucial to learn the difference between the dull, achy pain of muscle fatigue (which is often a normal part of rehabilitation) and the sharp, stabbing pain that signals a problem. Pushing through sharp pain is never a good idea. Likewise, any new or significantly increased swelling after an activity is a clear sign that you have overdone it. It’s your body’s way of saying, “Stop, that was too much.”
To help you self-monitor your activity levels, it’s useful to use a clear set of guidelines. This checklist, based on recommendations from organizations like the American Academy of Orthopaedic Surgeons, can serve as your personal “Green Light/Red Light” system:
- GREEN LIGHT (Signs of Safe Activity): A dull ache during or after activity that you would rate a 1-3 on a 10-point pain scale. Swelling that consistently decreases with elevation. You are meeting the range-of-motion goals set by your physical therapist.
- RED LIGHT (Warning Signs to Stop): Any sharp or stabbing pain, especially if it’s rated 4/10 or higher. The appearance of new bruising or a noticeable increase in swelling that doesn’t go down with elevation. Any numbness or tingling in your toes. The cast feeling significantly tighter after an activity.
Remember, healing timelines vary. Most medical experts confirm that minor fractures take 6-8 weeks to heal enough for weight-bearing, while more severe injuries can take 3-6 months. Trying to rush this process is counterproductive.
Patience during this phase is not passive waiting; it is an active and intelligent part of the healing strategy. Respect the red lights, and you will reach your destination much faster.
When to Start Massaging Your Incision to Prevent Stiffness?
After your cast is removed, you will notice two things: your skin will be dry and flaky, and your surgical incision, if you have one, will be a focal point of stiffness. Addressing both is key to restoring mobility and comfort. Scar tissue is the body’s natural “glue,” but if it adheres too tightly to the underlying tissues, it can restrict movement and cause persistent tightness. Scar massage, or mobilization, is a critical technique to prevent this.
However, timing is everything. Beginning massage too early can disrupt the healing incision and introduce infection. The absolute rule is to wait until the incision is fully closed, with no scabs, drainage, or open areas. Typically, this is around 2-3 weeks after surgery, when the scar appears pink and dry. Before this, your focus should be on gentle skin care. A post-cast protocol often involves soaking the leg in warm, soapy water for 5-10 minutes to soften the layers of dead skin, followed by gentle rubbing with a towel. Applying a quality moisturizing lotion or vitamin E oil helps restore the skin’s elasticity.
Once your surgeon or therapist gives you the green light, you can begin scar mobilization. These techniques should be done for a few minutes, several times a day. The goal is to gently move the scar over the underlying tissue, not to cause pain. Effective methods include:
- Cross-Friction Massage: Use one or two fingers to apply firm pressure and massage the scar in a direction perpendicular (across) to the scar line. This helps break up adhesions.
- Skin Rolling: Gently pinch the skin on either side of the scar and lift it, rolling it between your thumb and fingers along the length of the incision.
- Myofascial Release: Apply sustained, gentle pressure directly onto tight spots along or around the scar and hold for 30-60 seconds until you feel a release or softening.
This process helps to make the scar tissue more pliable and organized, preventing the long-term stiffness that can limit your ankle or knee movement for months or even years to come.
This simple, daily practice is a powerful investment in your long-term mobility and is a vital step in moving beyond the injury.
The “Resting Too Much” Trap That Worsens Joint Stiffness
While rest is essential for bone healing, the phrase “take it easy” can be dangerously misleading. For seniors, prolonged inactivity is a trap that leads directly to severe joint stiffness, decreased circulation, and accelerated muscle loss. The joints that are not immobilized, such as your hip, knee (if in a below-the-knee cast), and especially your toes, need regular movement to stay healthy. This is the core of proactive recovery management: balancing necessary rest with essential movement.
When a joint is still, the synovial fluid that lubricates it becomes thick, and the surrounding muscles and tendons shorten. This is why you feel so stiff after a long period of sitting. To combat this, you need to think of your day not in terms of rest, but in terms of a schedule of small, deliberate movements. Creating a “movement clock” can transform your approach from passive waiting to active healing. This is not about strenuous exercise; it’s about frequent, gentle motion.
A structured routine ensures that no joint is left immobile for too long. By setting reminders on your phone or a clock, you can build a powerful defense against the immobility trap.
Your Hourly Movement Checklist for Cast Recovery
- Every Hour (Awake): Wiggle your toes for one full minute. Make circles, point them, and flex them back. This is crucial for circulation and preventing stiffness in the foot.
- Every 2 Hours: If your cast allows, perform 20 gentle ankle pumps with the injured leg. If not, do them with your uninjured leg to promote overall blood flow.
- Every 3 Hours: Complete a set of 10 quad sets and 10 glute squeezes. This maintains activation in the major muscles supporting your leg and hip.
- Morning & Evening: Gently move your unaffected joints (hip, knee) through their comfortable range of motion. This prevents stiffness from spreading.
- Before Bed: Perform one last round of isometric contractions (quad sets, glute squeezes) for 5 minutes to promote circulation while you sleep.
This disciplined schedule of controlled micro-movements is the antidote to the “resting too much” trap. It keeps your joints lubricated, your muscles activated, and your blood flowing, laying the foundation for a much faster and more complete recovery once the cast comes off.
By actively managing your immobility, you take control of your healing process and set yourself up for a stronger return to your daily life.
The Surprise Bill Mistake During Scheduled Surgery
A leg injury is stressful enough without the added shock of an unexpected medical bill arriving weeks or months after your procedure. This issue, known as “surprise billing,” often happens during scheduled surgeries at in-network hospitals. While you’ve done your due diligence to ensure the hospital and your surgeon are covered by your insurance, other providers involved in your care—such as the anesthesiologist, radiologist, or surgical assistant—may not be. This can lead to thousands of dollars in out-of-network charges that you are suddenly responsible for.
This is a common and distressing mistake that can be avoided with proactive financial planning. Fortunately, consumer protections are in place. Since 2022, the No Surprises Act has provided federal protection against many of these situations. As the Consumer Financial Protection Bureau explains, the law protects you from surprise bills for most emergency services and for non-emergency services from out-of-network providers at in-network facilities. If you are uninsured or choose to self-pay, you have the right to receive a “Good Faith Estimate” of your costs beforehand. If the final bill exceeds this estimate by $400 or more, you have the right to dispute the charges.
To protect yourself, you must become your own advocate before your surgery date. Do not assume everyone at an in-network hospital is also in-network. The following checklist provides a clear plan of action for your financial pre-authorization:
- Request Written Confirmation: Ask the hospital’s billing department for written confirmation that EVERY provider involved in your care (anesthesiologist, radiologist, lab services, assistants) is in-network with your insurance plan.
- Get a Good Faith Estimate: If you are paying out-of-pocket, formally request this document. It is your right under the law.
- Document Pre-Authorizations: Get a pre-authorization approval number from your insurance company for the procedure and keep it in your records.
- Keep All Paperwork: Save copies of all agreements, estimates, and communications with the hospital and your insurance provider.
This foresight allows you to focus on what truly matters: healing properly without the looming fear of a devastating financial surprise.
Key takeaways
- The “use it or lose it” principle is real; perform isometric exercises like quad sets and glute squeezes hourly to combat rapid muscle loss.
- Proper leg elevation requires a gradual ramp of pillows to support the entire leg above heart level, with a small towel under the lower back to prevent strain.
- A proactive recovery is a scheduled one; use a “movement clock” to perform gentle range-of-motion exercises for all non-immobilized joints every few hours.
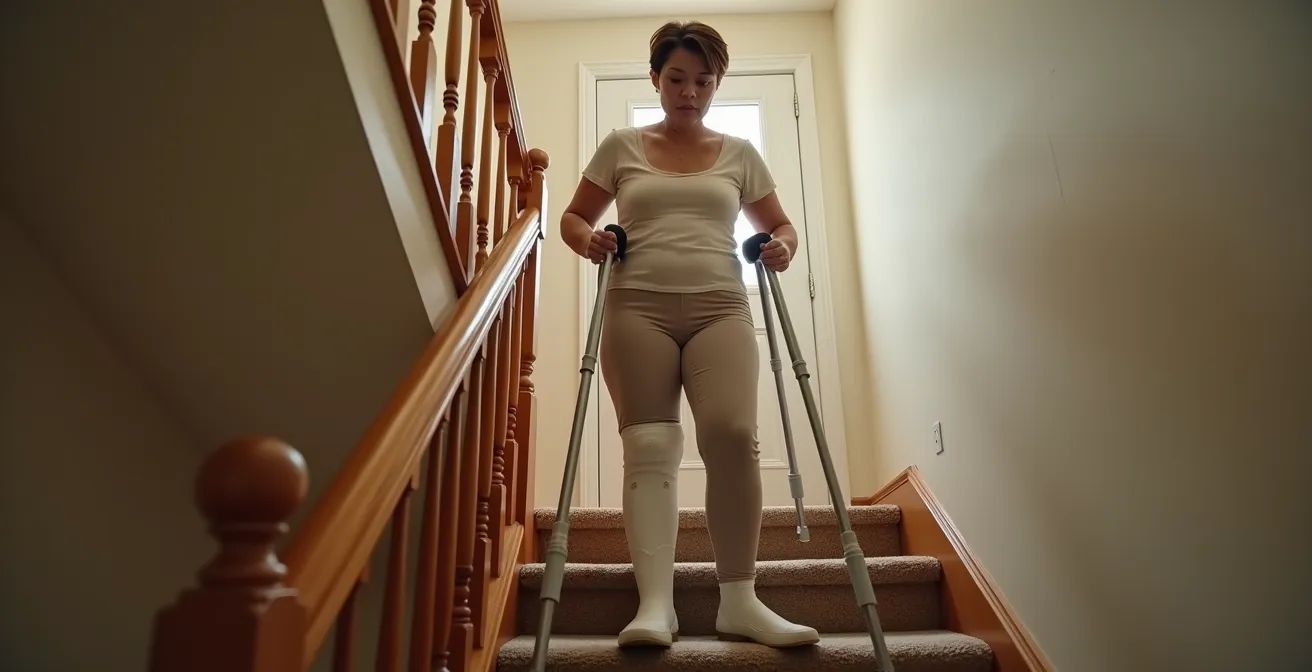
How to Wean Off Your Walker After Hip Surgery?
The moment you can begin to transition away from your walker or crutches is a major milestone in your recovery. It’s a tangible sign of returning independence. However, just like starting to bear weight, this process must be done gradually and safely. Abandoning your walking aid too soon can lead to a limp (which can become a hard-to-break habit), poor posture, and an increased risk of falling. The key is to follow a structured progression, moving from more support to less as your strength and confidence build.
Physical therapists often use a “Pyramid of Progression” model to guide this transition. This structured approach ensures you never take on more than your healing body can handle. Each stage builds on the last, allowing your muscles, bones, and sense of balance to adapt. It’s not a race; it’s a methodical climb toward unaided walking. The typical progression is as follows:
- Stage 1: Walker. Provides maximum stability and is typically used for the first 2-3 weeks or until you feel stable and secure.
- Stage 2: Two Crutches. The next step once you are cleared to bear at least 50% of your weight on the injured leg.
- Stage 3: One Crutch. Used on the opposite side of your injured leg, this is for when you can comfortably bear about 75% of your weight.
- Stage 4: Cane. Also used on the opposite side, a cane provides minimal balance support and is the last step before walking unaided.
Before you “graduate” from one stage to the next, and especially before abandoning aids altogether, you must pass a crucial Confidence Test. Therapists recommend you should be able to stand on your recovering leg, unaided, for at least 30 seconds without wobbling or needing to grab onto something for support. This simple test demonstrates that your muscles have the strength and your brain has re-established the balance pathways needed for safe, independent walking.
By following this careful, step-by-step process, you can reclaim your mobility with confidence, ensuring that each step you take is a safe and solid one on your path to full recovery.