

Prioritizing home safety on a fixed pension isn’t about buying the most expensive equipment; it’s about a strategic, phased approach that maximizes safety for every dollar spent.
- Focus first on “critical safety” zones like the bathroom, where a high number of serious falls occur.
- Evaluate major upgrades, like walk-in showers or lifts, based on a clear self-assessment of your current and near-future needs.
- Ensure any installation, DIY or professional, is anchored to structural studs for life-saving support, never just drywall or tile.
Recommendation: Start with a 10-minute audit of your highest-traffic areas to identify your home’s unique ‘trip-triggers’ and build your priority list from there.
The thought of renovating a home to make it safer for aging in place can be overwhelming, especially when you’re managing a fixed pension. The internet is filled with advice, often pushing expensive, large-scale projects that seem financially out of reach. You might see recommendations for complete bathroom remodels or high-tech lifts, leaving you feeling that safety is a luxury you can’t afford. This can lead to paralysis, where the fear of high costs prevents you from making any changes at all, leaving dangerous hazards unaddressed.
But what if the key wasn’t a bigger budget, but a smarter strategy? The real solution lies in thinking like a project manager, not just a homeowner. It’s about adopting a phased approach to modifications—prioritizing changes that offer the highest safety return for the lowest initial investment. Instead of a vague to-do list, you need a clear framework for auditing your home’s risks, understanding the true cost and benefit of each upgrade, and making decisions that protect both your well-being and your savings.
This guide will walk you through that exact framework. We’ll start by identifying the most critical danger zones in your house. Then, we will explore how to make informed decisions on major upgrades, how to find a trustworthy contractor, and how to ensure even the smallest installations are done correctly for maximum safety. You will learn to assess your own needs and create a practical, budget-conscious plan for a safer, more comfortable home.
To help you navigate these crucial decisions, this article is structured to guide you step-by-step through the process. The following sections break down everything from identifying risks to executing safe installations.
Summary: A Project Manager’s Guide to Home Safety on a Budget
- Why the Bathroom Is the Most Dangerous Room in Your House?
- How to Vet a Contractor for Aging-in-Place Experience?
- Wooden Ramps or Vertical Platform Lifts: Which Fits Your Porch?
- The DIY Handrail Mistake That Causes Wall Collapse Under Weight
- When to Replace Your Bathtub With a Walk-In Shower?
- How to Identify Hidden Fall Hazards in Your Hallways in 10 Minutes?
- How to Find Studs Behind Tile for Maximum Weight Capacity?
- How to Install Grab Bars on Tiled Walls Without Cracking the Ceramic?
Why the Bathroom Is the Most Dangerous Room in Your House?
The bathroom consistently ranks as the number one location for home injuries, and the reason is a dangerous combination of factors: hard surfaces, water, and the complex movements required for bathing and using the toilet. It’s not just a single slip that’s the problem; it’s the potential for a “chain reaction fall.” A moment of lightheadedness, a small slip on a wet tile, or difficulty lifting a leg over the tub wall can instantly escalate into a serious incident. According to CDC data, an estimated 235,000 people visit emergency rooms annually due to bathroom falls, making this small room the most critical area to address in any home safety plan.
The risk is amplified by confined spaces and the prevalence of ceramic, porcelain, and metal. Unlike a fall on a carpeted living room floor, a fall in the bathroom involves unforgiving surfaces that significantly increase the likelihood of fractures and head injuries. From a project manager’s perspective, this high-risk environment demands immediate attention. Prioritizing the bathroom isn’t just a suggestion; it’s the most logical and impactful first step in your phased renovation strategy. By neutralizing the hazards here, you mitigate the single greatest threat to your independence at home.
To effectively reduce these risks, your focus should be on creating stability and eliminating triggers. This involves a multi-pronged approach:
- Install grab bars: Securely anchor bars at a height of 33-36 inches near the toilet, inside the shower, and along the bathtub wall to provide multiple, reliable support points.
- Improve traction: Place high-quality, non-slip mats with suction cups both inside the shower or tub and on the floor outside to prevent the initial slip.
- Enhance lighting: Consider adding motion-sensor nightlights to eliminate the risk of navigating in the dark during nighttime trips.
- Remove clutter: Keep the floor clear of loose rugs, towels, and other items that can become tripping hazards.
- Reduce physical strain: A simple shower chair or a tub transfer bench can eliminate the challenges of standing for long periods or balancing while stepping over a high tub wall.
How to Vet a Contractor for Aging-in-Place Experience?
Once you’ve identified necessary modifications, finding the right person for the job is your next critical task. Not all contractors are equipped to handle the specific needs of aging-in-place renovations. A general-purpose handyman might be great at hanging drywall, but they may not understand the specific load-bearing requirements for a grab bar or the subtle ergonomic details that make a modification truly effective. Hiring someone without this specialized knowledge can result in work that looks fine but fails under pressure, putting your safety at risk.
Your goal is to find a professional who thinks about accessibility proactively. Look for a contractor with a CAPS (Certified Aging-in-Place Specialist) designation. This certification, offered through the National Association of Home Builders (NAHB), indicates that the contractor has been trained in the unique requirements of designing and building for seniors. You can and should verify their certification through the NAHB database. This isn’t just a piece of paper; it’s proof of expertise in creating safe, comfortable, and functional living environments.
When interviewing potential candidates, go beyond asking for a simple quote. Use scenario-based questions to gauge their problem-solving skills and experience. A truly experienced aging-in-place specialist will be able to provide thoughtful, detailed answers. Here are key questions to ask:
- “Describe a project where a senior client’s health needs changed mid-renovation. How did you adapt the plan?”
- “My mother has arthritis. What specific faucet handles and doorknobs would you recommend, and why?”
- Request references specifically from past senior clients or their families, and ask about their experience with the contractor’s communication and professionalism.
- Ask for a phased quote: one for “Critical Safety” (e.g., grab bars), one for “Enhanced Independence” (e.g., a walk-in shower), and one for “Long-Term Comfort” (e.g., adjustable-height counters). This reveals if they understand a phased, budget-conscious approach.
Wooden Ramps or Vertical Platform Lifts: Which Fits Your Porch?
Navigating stairs at the entrance of your home can become one of the most significant barriers to independence. When considering a solution, the two primary options are a ramp or a vertical platform lift (VPL). The decision isn’t just about cost; it’s a strategic choice involving space, caregiver effort, and long-term maintenance. This is where you must balance “future-proofing” against “over-engineering.” A VPL might seem like the ultimate solution, but its high cost and maintenance needs may be excessive if a well-built ramp can serve your needs for years to come.
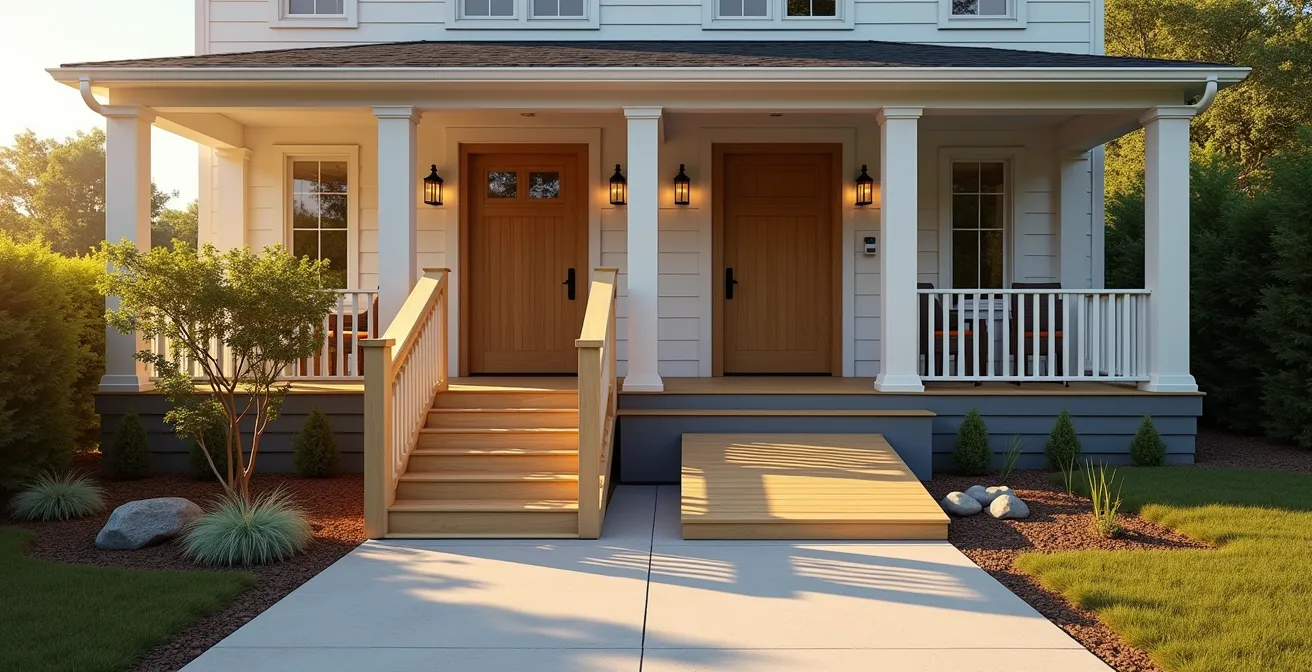
A ramp’s biggest constraint is space. Safety standards generally require 12 feet of ramp for every 1 foot of vertical rise. For a porch that’s 2 feet high, you’d need a 24-foot ramp, which can dominate a front yard. A VPL, by contrast, has a small footprint of about 5×5 feet. However, a VPL is a complex machine that requires power and regular maintenance. In the event of a power outage, you could be stranded without a battery backup. Furthermore, as an analysis of costs shows, ongoing maintenance costs average $350 to $600 annually for home elevators and lifts, a recurring expense to factor into your fixed budget.
To make the best decision for your budget and home, a direct comparison is essential. This table, based on data from a recent real estate analysis, breaks down the key factors to consider:
| Criteria | Portable Ramps | Modular Aluminum | Wooden Ramp | Vertical Platform Lift |
|---|---|---|---|---|
| Cost Range | $100-$300 | $1,500-$4,000 | $2,000-$5,000 | $12,000-$35,000 |
| Space Required | Minimal | 12 ft per 1 ft rise | 12 ft per 1 ft rise | 5×5 ft footprint |
| Caregiver Effort | High | Moderate | Moderate | None |
| Power Outage Risk | None | None | None | High (needs battery backup) |
| Resale Value | Low | Moderate (removable) | Can add value | Can add value |
The DIY Handrail Mistake That Causes Wall Collapse Under Weight
Installing handrails along hallways or staircases seems like a straightforward DIY project, but a common and dangerous mistake can turn a safety feature into a major hazard. The single most critical error is failing to anchor the handrail into the structural studs behind the drywall. Many people mistakenly use drywall anchors, believing they are sufficient. They are not. A drywall anchor is designed to hold a few pounds of static weight, like a picture frame. It is not designed to support the dynamic, sudden weight of a person stumbling and grabbing for support.
When a person loses their balance, they don’t gently lean on a handrail; they grab it with force. This can exert hundreds of pounds of pressure in an instant. If the rail is only secured to drywall, the anchors will rip out, taking a large chunk of the wall with them and causing the fall to be even worse. This is why a “structural integrity audit” is a non-negotiable part of installation. You must ensure the screws are biting into solid wood. As professional installers confirm, grab bars and handrails must be securely anchored to support body weight.
Grab bars must be securely anchored to support body weight, with professional installation ensuring proper wall anchoring. Organizations in many communities offer free installation services for seniors to ensure safety compliance
– Mr. Handyman, Mobility and Safety Modifications
To avoid this catastrophic failure, follow these critical safety steps. Never compromise on anchoring; it is the difference between a reliable safety device and a dangerous illusion.
- Always locate and drill directly into wall studs. Never rely on any type of drywall anchor alone.
- Use structural screws, which are designed to flex slightly under a heavy load, not brittle drywall screws that can snap.
- Verify stud locations using multiple methods. Start by measuring the standard 16 inches from a corner, then confirm with a magnetic or electronic stud finder.
- Before completing the installation, test the anchoring points to ensure they can handle a significant load, ideally up to 250 pounds.
- For ultimate safety, especially in critical areas, consider opening the wall to install solid wood blocking between the studs, providing a continuous, solid surface for anchoring.
When to Replace Your Bathtub With a Walk-In Shower?
The decision to replace a traditional bathtub with a walk-in shower is one of the most common—and expensive—aging-in-place modifications. The primary benefit is eliminating the high tub wall, a major trip hazard. But how do you know when this significant investment is truly necessary? The answer lies in an honest self-assessment. Don’t wait for a fall to occur. Instead, proactively look for the early warning signs that the tub is becoming a risk. This “Trip-Trigger Assessment” can help you decide if now is the time.
Ask yourself the following questions. If you answer “yes” to two or more, it’s a strong indicator that you should seriously consider a modification:
- Do you find yourself using the wall or a towel rack for support when stepping in or out of the tub?
- Have you experienced a slip, a near-slip, or a moment of unsteadiness in or around the tub in the last six months?
- Does knee, hip, or back pain make the high-stepping motion difficult or painful, even on good days?
- Do you sometimes avoid bathing when you are home alone due to safety concerns?
- Has your doctor or a physical therapist specifically recommended reducing fall risks at home?
If a full conversion isn’t in the budget right now, remember the “Phased Renovation Strategy.” You don’t have to go from zero to a full remodel overnight. There are intermediate steps that can significantly improve safety at a fraction of the cost. A complete walk-in shower conversion provides the maximum safety with its zero-threshold entry and built-in seating, but it’s a major project. Consider the phased options below, with cost data from a recent aging-in-place financial checklist, to see what fits your current needs and budget.
| Phase | Solution | Cost | Installation Time | Safety Improvement |
|---|---|---|---|---|
| Phase 1 | Tub transfer bench + handheld shower | $150 | 1 hour DIY | Moderate |
| Phase 2 | Tub cut-out insert | $1,500 | 1 day professional | High |
| Phase 3 | Complete walk-in shower conversion | $9,500 average | 3-5 days professional | Maximum |

How to Identify Hidden Fall Hazards in Your Hallways in 10 Minutes?
While bathrooms are the most dangerous room, hallways are the arteries of your home. You travel them dozens of times a day, often in low light or when you’re tired. It’s easy to overlook the subtle but significant fall hazards they contain. While research shows that about half of all falls happen at home, many of these are preventable with a quick and focused audit. You don’t need expensive equipment, just 10 minutes and a new way of looking at these familiar spaces.
The key is to test the environment under real-world conditions. Don’t just glance down the hall; interact with it. This quick audit will reveal risks you’ve likely stopped noticing. Perform these five simple tests to uncover hidden dangers before they cause a problem. This proactive check is a core part of a home safety strategy and costs nothing but a few moments of your time.
Your 10-Minute Hallway Safety Audit:
- Nighttime Path Audit: Wait until evening and turn off the lights. Walk the route from your bedroom to the bathroom. Are there dark spots where you can’t see the floor? This immediately identifies where you need nightlights.
- Sock Slide Test: Put on a pair of socks and walk your hallways. This will help you identify slick spots on hardwood or tile floors that your regular shoes might mask. These are areas that may need a non-slip runner.
- Wall Hazard Check: Run your hand along the walls at hip height. Do you feel protruding picture frames, sharp furniture corners, or decorative sconces that could catch on clothing or cause an injury during a stumble?
- Transition Trap Inspection: Carefully inspect where one type of flooring meets another (e.g., carpet to tile). Any transition lip or edge higher than 1/4 inch is a significant trip hazard that needs to be beveled or removed.
- Furniture Path Test: Try navigating the hallway with your eyes mostly closed (while using a wall for light guidance). This simulates moving when drowsy or in poor light and will quickly reveal any furniture or clutter that encroaches on the main pathway.
Key Takeaways
- Your budget’s biggest ally is a phased strategy: address critical safety first, then plan for larger independence-enhancing projects.
- Never underestimate the importance of structural integrity. A grab bar or handrail is only as strong as its anchor point in a wall stud.
- The “right” solution (e.g., ramp vs. lift) depends on a careful analysis of your space, long-term needs, and ongoing maintenance costs, not just the initial price tag.
How to Find Studs Behind Tile for Maximum Weight Capacity?
Installing a grab bar on a tiled wall presents a unique challenge: you must locate the solid wood studs behind not only the drywall but also a layer of mortar and ceramic tile. Drilling randomly is not an option. It will result in a weak anchor and a cracked tile. A standard electronic stud finder can be unreliable through these dense layers. Therefore, you need to employ more detective-like techniques to ensure your grab bar is anchored securely enough to support your full body weight in an emergency.
The most reliable methods combine visual inspection with specialized tools. Start by looking for clues. Studs are typically spaced 16 or 24 inches apart on center. If you can find one, you can usually measure to find the others. However, confirming that first stud’s location is the crucial first step. Remember that according to professionals, grab bars should be mounted at a height between 33 and 36 inches for optimal use, so your stud-finding efforts should be focused in that horizontal band.
Use a combination of these advanced techniques to pinpoint stud locations with confidence. Always double-verify with at least two different methods before you begin drilling the final, larger holes for the mounting hardware.
- Grout Line Detective: Look for faint vertical grout lines that seem to run the full height of the wall. These can sometimes indicate where two pieces of backer board meet, and those seams are almost always centered on a stud.
- Deep Scan and Magnetic Finding: Use a high-quality electronic stud finder with a “deep scan” mode. Better yet, use a specialized magnetic finder (like a StudBuddy) that is powerful enough to detect the metal screws or nails that hold the backer board to the studs through the tile.
- The Drill and Probe Method: As a last resort, you can drill a tiny 1/16-inch pilot hole in a grout line where you suspect a stud. Insert a piece of bent wire (like from a coat hanger) and feel for the hard edge of the wood stud. This minimizes visible damage.
- Stud Bay Mapping: Once you’ve definitively located one stud, use a tape measure to mark 16 inches and 24 inches on either side. Use your magnetic finder to confirm the presence of screws at these locations.
How to Install Grab Bars on Tiled Walls Without Cracking the Ceramic?
You’ve done the hard work of locating the studs behind your tiled wall. Now comes the most delicate part of the operation: drilling through the ceramic tile without shattering it. A cracked tile not only ruins the look of your bathroom but can also compromise the water seal, leading to moisture damage behind the wall. The key to success is patience and using the right tools and techniques. Rushing this process or using the wrong drill bit is a guaranteed recipe for a costly mistake.
The fundamental principle is to avoid heat and vibration. Heat buildup can cause the tile’s glaze to crack, and the “hammer” function on a drill will shatter the tile instantly. You must use a drill in its “drill-only” mode. You will also need a special glass-and-tile drill bit, which has a carbide spear-point designed to grind away the material rather than chip at it. Starting with a small pilot hole and gradually widening it is far safer than trying to drill the final-sized hole in one go.
By following a methodical, step-by-step process, you can create clean, precise holes that allow for a secure and waterproof installation. This is the final and most crucial execution phase of your bathroom safety upgrade.
Action Plan: Ceramic-Safe Drilling Technique
- Start with a 1/8-inch glass-and-tile drill bit to create a precise pilot hole. This small bit is less likely to “walk” across the slippery tile surface. Apply firm, steady pressure.
- Create a small “dam” around the drill spot using plumber’s putty. Fill this small reservoir with a little water. This will keep the drill bit cool and reduce dust.
- Once the pilot hole is through the tile, switch to a 1/4-inch bit, and then finally to the bit size required for your mounting hardware. Continue to use water for cooling.
- Use your drill on a slow to medium speed and in “drill-only” mode. Never, under any circumstances, use the hammer drill function on tile.
- After the grab bar is securely mounted into the studs, apply a bead of 100% silicone caulk around the outside edge of each mounting flange to create a permanent, waterproof seal.
Now that you have a comprehensive plan, the next step is to begin your own home audit. Start with the highest-risk areas and build your phased renovation plan. A safer home is within your reach, not through massive spending, but through smart, strategic, and well-executed modifications.