
Generic advice fails to prevent stair-related falls; only a systematic audit of lighting, grip, and user habits can truly secure a staircase.
- Shadows and poor contrast are not just inconveniences; they are “visual traps” that actively trick the eye, increasing miss-step risk.
- Surface safety is measurable by its “Coefficient of Friction” (COF)—bare wood is a known hazard, while specific treads offer quantifiable protection.
Recommendation: Do not wait for a near-miss. Use the checklists in this guide to conduct a home safety audit today and implement at least two immediate improvements.
The staircase in your home can shift from a simple connection between floors to a source of daily anxiety. For many seniors aiming to age in place, it represents a significant fall risk. The standard advice—”be careful,” “turn on the lights”—is well-intentioned but dangerously inadequate. It places the burden of safety entirely on user vigilance, which can fail in a moment of distraction or fatigue. The reality is that stair safety isn’t just about behavior; it’s an engineering problem that requires a systematic solution.
True security comes from proactively eliminating risks, not just reacting to them. This involves treating your staircase not as a piece of architecture, but as a system with critical components: lighting, surface grip, and structural supports. The common approach often overlooks the specific science of why falls happen. It’s not just darkness, but the subtle “visual traps” created by shadows that can deceive depth perception. It’s not just a slippery surface, but a low coefficient of friction that can be precisely measured and corrected.
This guide abandons platitudes. Instead, it provides a practical, auditor-level framework for retrofitting your existing staircase for maximum safety, without requiring major renovations or the immediate installation of a stairlift. We will dissect the three pillars of stair safety: eliminating visual hazards, maximizing surface grip, and modifying behavior and supports. By addressing each of these technical points, you can transform a daily hazard into a secure and confident pathway.
This article provides a detailed audit of your home’s most critical high-risk areas. The following sections break down the specific, actionable steps you can take to immediately improve safety on and around your stairs.
Summary: A Systematic Guide to Staircase Safety
- Why shadowy steps increase the risk of missed footing by 40%?
- How to use the “three points of contact” rule on stairs?
- Fully secured carpet or bare wood with treads: which is less slippery?
- The laundry basket hazard: solutions for moving items upstairs safely
- Where to position a second handrail for maximum stability?
- How to identify hidden fall hazards in your hallways in 10 minutes?
- The height mistake that makes grab bars useless when you slip
- How to secure area rugs to hardwood floors to prevent tripping?
Why shadowy steps increase the risk of missed footing by 40%?
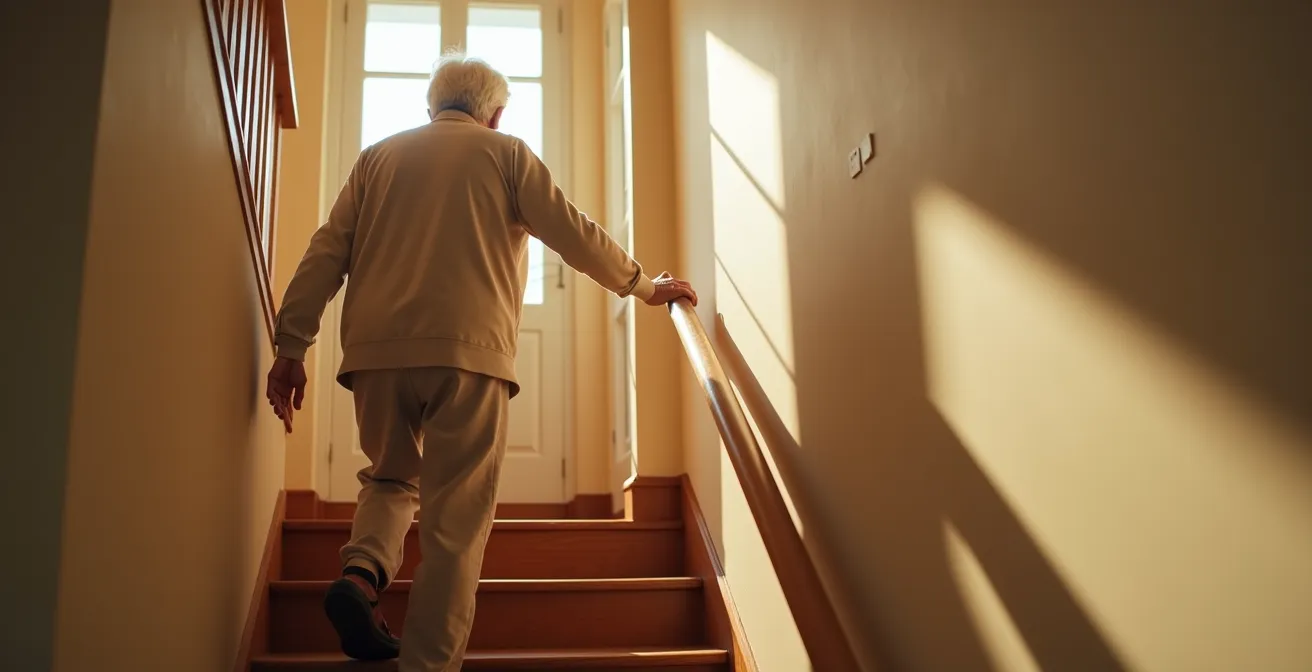
Poor lighting is the primary accomplice in stair-related falls, but the danger isn’t just darkness—it’s deception. Shadowy steps create “visual traps” that trick the brain by obscuring the edge of the tread, making it nearly impossible to judge its height and depth accurately. For an older adult, this momentary confusion is often the direct cause of a misstep. Research shows that vision plays a central role in successful stair negotiation, and locating the first step is particularly problematic in low light. When the edge definition is poor, the brain has to guess, and that guess can be catastrophic.
The connection between vision and falls is not theoretical. According to CDC data, a staggering 46.7% of seniors with severe vision impairment experienced falls, highlighting how critical clear visual information is for maintaining balance. Stairs are uniquely challenging because they require constant visual re-evaluation. A study published by the NCBI identifies stairs as the most common environmental hazard associated with falls in older people with visual impairment, accounting for 30% of all such incidents. This is not a failure of caution; it’s a failure of the environment to provide clear, unambiguous visual cues.
To eliminate these visual traps, your lighting strategy must focus on two things: uniformity and contrast. Uniform light from multiple sources (e.g., at both the top and bottom of the staircase) eliminates the sharp shadows cast by a single overhead fixture. Additionally, using high-contrast, non-slip tape on the edge of each step provides a clear visual line that the eye can lock onto, even in lower light conditions. This removes the guesswork and gives the brain the data it needs to place a foot confidently.
How to use the “three points of contact” rule on stairs?
The “Three Points of Contact” rule is a fundamental principle of industrial safety that is directly applicable to navigating stairs at home. It mandates that you maintain three secure points of contact with your environment at all times—either two feet and one hand, or one foot and two hands. Adopting this as a non-negotiable habit transforms stair use from a balancing act into a stable, controlled process. It builds a redundant safety system into every step you take; if one point of contact slips (a foot), the other two (a hand and the other foot) are already engaged to prevent a fall.
Implementing this rule requires conscious practice until it becomes automatic. The first step is to always place your hand on the handrail *before* taking the first step up or down. This action should become an unbreakable ritual. While on the stairs, your hand should slide along the rail, maintaining contact. If you only have one handrail, turn your body slightly towards it to improve leverage. Crucially, you must eliminate all mental and physical distractions. Using a phone, carrying complex thoughts, or being rushed are all enemies of this rule.
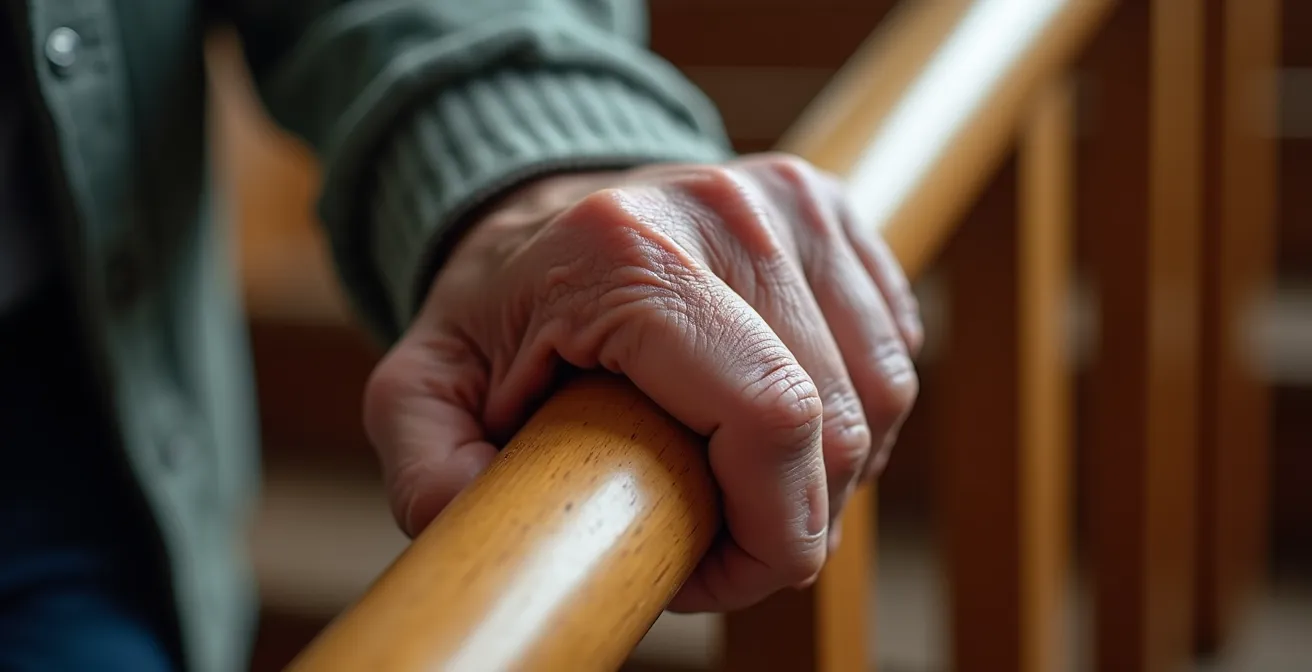
The image above demonstrates the correct “power grip,” where the hand and fingers fully encircle the rail. This is far more secure than resting the hand on top of a decorative or oversized railing. This full grip engages the entire kinetic chain from your hand to your shoulder, providing the stability needed to arrest a fall. Practice this method: place your hand on the rail, scan the steps ahead, and move deliberately, ensuring three points remain in contact with the structure throughout your ascent or descent.
Fully secured carpet or bare wood with treads: which is less slippery?
The choice of stair surface is a critical decision that directly impacts fall risk. While many assume carpet is inherently safer, the answer is more technical. The safety of a surface is measured by its coefficient of friction (COF), a number that indicates how much grip it provides. Bare wood, especially when polished, has a notoriously low COF, making it a significant hazard, particularly when wet. A properly secured, low-pile carpet offers a better COF, but the most effective solution is the application of high-friction treads.
Data from research provides a clear hierarchy of safety. The following table, based on comparative data, shows how different surfaces perform. Rubber and aluminum oxide treads offer a superior COF, providing excellent grip even in wet conditions, making them a top-tier safety upgrade for any type of stair.
| Surface Type | Dry COF | Wet COF | Safety Rating |
|---|---|---|---|
| Rubber Treads | 0.85-1.0 | 0.60-0.75 | Excellent |
| Aluminum Oxide Treads | 0.75-0.90 | 0.55-0.70 | Very Good |
| Secured Carpet | 0.60-0.80 | 0.40-0.55 | Good |
| Bare Wood | 0.40-0.60 | 0.20-0.35 | Poor |
| Vinyl Treads | 0.65-0.75 | 0.50-0.60 | Good |
Beyond the surface itself, what you wear on your feet is just as important. As experts from Elder Options of Texas note in their guide on stair safety:
Footwear influences balance and the subsequent risk of slips, trips, and falls by altering somatosensory feedback to the foot and ankle and modifying frictional conditions at the shoe/floor interface. Walking indoors barefoot or in socks and walking indoors or outdoors in high-heel shoes have been shown to increase the risk of falls in older people.
– Elder Options of Texas, Stair Safety Tips for Seniors
Therefore, the safest system combines a high-COF surface, like rubber treads, with well-fitting, rubber-soled shoes. This combination provides the maximum possible grip and sensory feedback, drastically reducing the risk of a slip.
The laundry basket hazard: solutions for moving items upstairs safely
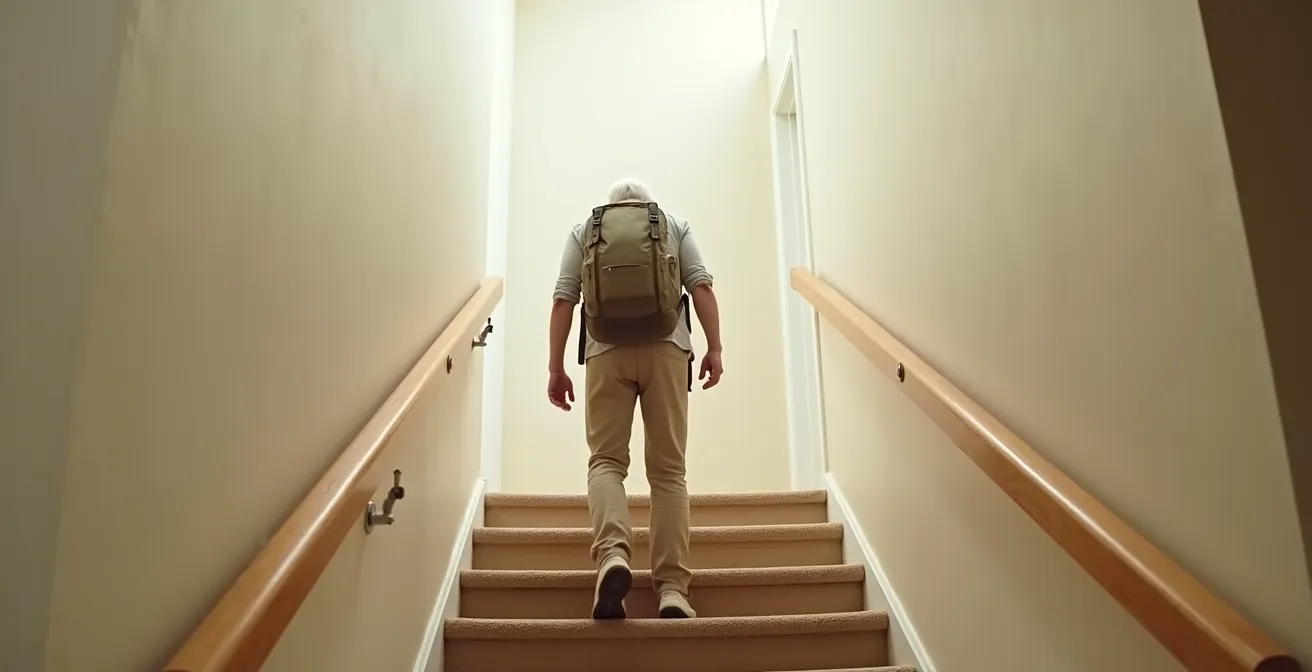
Carrying items like a laundry basket, groceries, or cleaning supplies on stairs is one of the most common and dangerous activities in a multi-level home. It creates a “triple threat” to safety: it occupies one or both hands, preventing use of the handrails; it obstructs your view of the steps below; and it shifts your center of gravity, making you less stable. This seemingly benign task is a major contributor to the over 1 million emergency room visits for stair-related accidents in the US each year. The solution is not to be “more careful,” but to adopt a new system for load management.
The primary goal is to keep both hands free at all times. This is non-negotiable. The most effective way to achieve this is by using a comfortable backpack or a cross-body bag for transporting items. This keeps the load secured to your body’s center of gravity and leaves your hands available to maintain three points of contact. For larger loads, specialized stair-climbing shopping trolleys can be a valuable investment. An even simpler strategy is to create duplicate supply stations, keeping a set of cleaning supplies and spare linens on each floor to eliminate the need to transport them.
If you absolutely must carry an item, use the “Core-Lock Method”: hold the object close to your body’s center, engage your core muscles for stability, and ascend or descend sideways to maintain a wider base of support and a clear view of the steps. Placing a small chair or bench on a landing can also provide a crucial resting point or a safe place to temporarily set down objects mid-climb. These strategies are not conveniences; they are critical safety protocols to mitigate a well-documented hazard.
Where to position a second handrail for maximum stability?
A single handrail is a design flaw, not a safety feature. It forces you to choose a side, leaving you unsupported if you begin to fall away from the rail. Installing a second handrail is one of the most powerful safety upgrades you can make, as it guarantees support is always within reach and is essential for implementing the “Three Points of Contact” rule effectively. However, its placement is not arbitrary; it must adhere to precise ergonomic and safety standards to be effective.
The height is the most critical factor. According to ADA compliance standards, handrail height must be between 34 inches minimum and 38 inches maximum vertically above the walking surface or the nose of the stair treads. This height range allows most adults to grip the rail comfortably without having to stoop or over-reach, ensuring they can apply leverage effectively during a slip. A rail that is too low or too high can actually worsen instability in a fall.
Equally important are the grip profile and clearance. Many homes have decorative handrails that are wide, rectangular, or ornate, making them difficult to encircle. For maximum safety, a handrail must allow for a “power grip,” where your fingers can wrap fully around the surface. This means a circular cross-section is ideal. Furthermore, there must be a minimum clearance of 1 1/2 inches between the handrail and the wall. This space is essential to prevent your knuckles from being scraped or jammed during a sudden grip, which could cause you to let go at the most critical moment. A second handrail, correctly positioned and shaped, provides a constant, reliable source of stability.
How to identify hidden fall hazards in your hallways in 10 minutes?
The risk of a fall doesn’t begin or end at the staircase itself; the hallways leading to it are critical transition zones that often contain hidden hazards. A cluttered or poorly lit hallway can cause a trip or stumble that sends you falling onto the stairs. Performing a quick but systematic audit of these areas is an essential part of a comprehensive home safety plan. This isn’t about general tidying up; it’s about actively hunting for specific, subtle risks that are often invisible during daily life.
This 10-minute audit uses several non-obvious techniques to reveal what you normally miss. For example, walking through the hall in socks—the “Sock Test”—provides tactile feedback that your shoes normally block, allowing you to feel for loose floorboards, raised tile edges, or bunched-up carpet seams. Similarly, analyzing the path at night reveals “blackout zones” where your own body can cast a dangerous shadow, obscuring a hazard right in your path. Using your phone to record a slow-motion video at floor level can also reveal subtle tripping hazards that are impossible to spot at normal speed.
By dedicating just a few minutes to this focused inspection, you can proactively identify and neutralize dangers before they cause an incident. Use the following checklist to guide your audit and create a concrete action plan.
Your 10-minute hallway hazard audit plan
- Perform the ‘Sock Test’: Walk through hallways in socks to feel for subtle hazards like uneven floorboards or loose tiles that shoes would mask.
- Record at Floor Level: Use your smartphone to record a slow-motion video while walking, holding the phone near the floor.
- Analyze the Playback: Watch the video to identify small tripping hazards (like a cable or rug edge) that are invisible from a standing height or at normal speed.
- Conduct a ‘Light-Path Analysis’: Walk through the halls at night with only normal ambient light on. Identify any “blackout zones” or areas where your body casts a dangerous shadow on the path ahead.
- Check Switch Accessibility: Test that all hallway lights can be turned on and off from both ends of the hall, ensuring you never have to walk into a dark space.
The height mistake that makes grab bars useless when you slip
A handrail is your most important piece of safety equipment on a staircase, but only if it’s functional. A common and dangerous mistake is prioritizing aesthetics over ergonomics, resulting in handrails that are incorrectly positioned or impossible to grip securely in an emergency. As Dr. Eric B. Larson, M.D., an expert in aging, points out, this is a widespread problem that nullifies the very purpose of the rail.
The handrail is an often-overlooked safety component that studies consistently show can help with balance and prevent a fall on stairs. Unfortunately, handrails in many homes are more decorative than functional. If they are large, bulky, rectangular or ornately shaped, they can be hard to grip. The safest rails are rounded, and your hand should be able to completely encircle it when you grasp it.
– Eric B. Larson, M.D., AARP Home Safety Guide
The “useless height” mistake happens when a rail is installed for looks, often aligned with a decorative wainscoting line rather than at the biomechanically correct height. As stated by ADA standards, that height is between 34 and 38 inches from the stair nosing. A rail that’s too low forces you to bend, compromising your balance. A rail that’s too high reduces your leverage, making it difficult to stop a fall. The prescribed height ensures your arm is in an optimal position to push or pull effectively.
Beyond height, the shape and clearance are paramount. A secure “power grip,” where your hand fully encircles the rail, is impossible on a wide, rectangular “2×4” style rail. The safest profile is circular, with a diameter between 1.25 and 2 inches. This allows for a firm, confident grip. Finally, the rail must have at least 1.5 inches of clearance from the wall. Without this space, your knuckles can be painfully jammed in a slip, forcing you to let go when you need the support most. An audit of your handrails for these three factors—height, grip profile, and clearance—is not optional.
Key takeaways
- Stair safety is a technical system, not a matter of “being careful.” Proactive risk elimination is the only effective strategy.
- Lighting must be uniform to eliminate deceptive shadows, and step edges must have high-contrast markings to provide clear visual cues.
- The “Three Points of Contact” rule (two feet, one hand or two hands, one foot) is a non-negotiable habit for safe stair use.
How to secure area rugs to hardwood floors to prevent tripping?
Area rugs on hardwood floors, especially at the top or bottom of a staircase, are one of the most significant and underestimated tripping hazards in any home. An unsecured rug can slide, and a curled edge can easily catch a foot, leading to a fall with severe consequences. Removing them entirely is the safest option, but if you choose to keep them, they must be aggressively and permanently secured. The method you choose involves a trade-off between effectiveness, reusability, and potential floor damage.
There are several methods for securing rugs, each with its own pros and cons. High-friction pads are a good, non-damaging option, but may allow for some minor shifting. Double-sided rug tape offers excellent hold but can be difficult to remove and may leave residue. For a semi-permanent solution with zero floor damage, a thin bead of 100% silicone caulking around the underside perimeter of the rug provides an outstanding grip that is still removable. Bevel edge strips are also an excellent choice as they not only hold the rug down but also create a smooth transition to reduce the tripping hazard from the edge itself.
The following table from AARP’s home safety guide provides a clear comparison of the most common methods:
| Method | Floor Damage Risk | Reusability | Effectiveness | Ease of Cleaning |
|---|---|---|---|---|
| High-friction pads | None | Excellent | Good | Easy |
| Rug tape | Low-Medium | Poor | Excellent | Difficult |
| Silicone caulking | None | Good | Very Good | Moderate |
| Bevel edge strips | None | Excellent | Excellent | Easy |
Securing a rug is not a one-time task. It requires regular inspection. You must check weekly for any curling at the corners or edges, as this is the most common failure point. A monthly check of the grip pad or tape is also necessary to ensure it hasn’t worn out or lost its adhesion. A simple rule is to never place loose rugs at the top or bottom of a stairway; the risk is simply too high. Any rug in these critical zones must be fully and reliably anchored.
Your safety at home is not a matter of chance; it is the result of deliberate, informed decisions. By conducting this safety audit and implementing these targeted, evidence-based improvements, you are taking active control of your environment. Start today by choosing one area—lighting, grip, or handrails—and making a tangible change.