
Properly transitioning to forearm crutches is a biomechanical upgrade, not just a change of mobility aid, that corrects posture and enhances long-term stability.
- Forearm crutches transfer body weight through the forearms, bypassing the wrist’s delicate carpal tunnel and reducing the risk of strain injuries common with canes.
- Mastering the two-point gait creates a rhythmic, energy-efficient walking pattern that mimics natural human ambulation and promotes better kinetic chain alignment.
Recommendation: Focus on the precise adjustment of cuff height and handle position, and dedicate practice to the specific motor patterns detailed in this guide to achieve a successful transition.
For many individuals requiring long-term ambulatory support, the progression from a cane or walker can seem daunting. The conventional cane, while simple, often creates postural asymmetry and significant wrist strain. A walker provides stability but is cumbersome and promotes a stooped, inefficient gait. The transition to forearm (Lofstrand) crutches represents a significant shift in philosophy—from passive support to active, dynamic mobility. This is not merely about choosing a different piece of equipment; it is about engaging in a process of biomechanical and neurological recalibration.
The common advice often stops at basic height adjustment. However, a successful transition hinges on a deeper understanding of anatomical principles. It involves retraining the body’s kinetic chain, re-educating the brain’s proprioceptive maps, and mastering specific gait patterns that maximize efficiency while minimizing stress on the upper limbs. This guide moves beyond rudimentary instructions to provide a clinical framework for this transition, focusing on the anatomical science required to unlock the full potential of forearm crutches for superior posture and sustained independence.
For those who prefer a visual demonstration, the following video offers an excellent overview of various crutch gait patterns, including the foundational techniques discussed in this article. It serves as a practical supplement to the detailed biomechanical principles we will explore.
This article provides a structured, in-depth exploration of this transition. We will dissect the biomechanical advantages, provide a protocol for learning efficient movement, and detail the critical adjustments and safety measures necessary for long-term success. The following summary outlines the key areas we will cover.
Summary: A Clinical Guide to Forearm Crutch Transition
- Why Forearm Crutches Put Less Strain on Wrists Than Canes?
- How to Learn the “Two-Point Gait” for Efficient Walking?
- Loftstrand (Forearm) or Axillary (Underarm): Which Is Better for Long-Term Use?
- The Underarm Pressure Error That Causes Numbness in Fingers
- How to Adjust the Cuff to Prevent Chafing on Your Arms?
- The Cast Iron Mistake That Causes Wrist Fractures
- Why Your Brain Needs to Re-Learn How to Trust Your Leg?
- How to Wean Off Your Walker After Hip Surgery?
Why Forearm Crutches Put Less Strain on Wrists Than Canes?
The primary biomechanical failure of a standard cane lies in its method of load transfer. A cane forces the user’s entire upper body weight to be channeled directly through the wrist joint into a single point of contact. This places immense pressure on the carpal tunnel, a narrow passageway housing the median nerve and flexor tendons. Over time, this concentrated load can lead to chronic wrist pain, tendonitis, and exacerbation of conditions like carpal tunnel syndrome. While a single forearm crutch can be used, the system is designed for bilateral support that fundamentally alters this dynamic.
Forearm crutches, by contrast, create a superior system of biomechanical load transfer. The force is distributed along the length of the forearm via the cuff, while the handgrip provides control. This redirects the majority of the load away from the delicate wrist structure and onto the larger, more robust bones of the forearm (the radius and ulna). This distribution is critical for long-term users. Furthermore, inefficient gait patterns dramatically increase the body’s energy demands. In fact, some research shows that using crutches requires approximately 33% more energy than normal walking, making an efficient tool essential.
A cane promotes a lateral, hip-hiking gait that disrupts the body’s natural kinetic chain. Forearm crutches encourage a more symmetrical, upright posture. By providing support points that are in line with the body’s center of gravity, they allow the user to maintain a more natural pelvic and spinal alignment, reducing compensatory movements that lead to back and hip pain. This improved alignment is not just about comfort; it’s about preserving joint health over decades of use. The fluid, reciprocal motion they enable is simply more mechanically sound.
How to Learn the “Two-Point Gait” for Efficient Walking?
The “two-point gait” is the most fluid and energy-efficient pattern for long-term forearm crutch users who can bear partial weight on both legs. It closely mimics the natural reciprocal motion of walking, where the opposite arm and leg swing forward in synchrony. The goal is to create a rhythmic, seamless movement rather than a series of disjointed steps. This pattern requires two points of contact with the ground at all times (e.g., left crutch and right foot, then right crutch and left foot).
Mastering this gait is a process of motor relearning. It requires conscious practice to build the coordination and muscle memory until the pattern becomes automatic. Initially, the cognitive load can be high, so it is crucial to start in a controlled environment free from distractions. The focus should be on rhythm and smoothness, not speed. Many users find it takes a few weeks of consistent practice to feel natural and confident with the two-point gait.
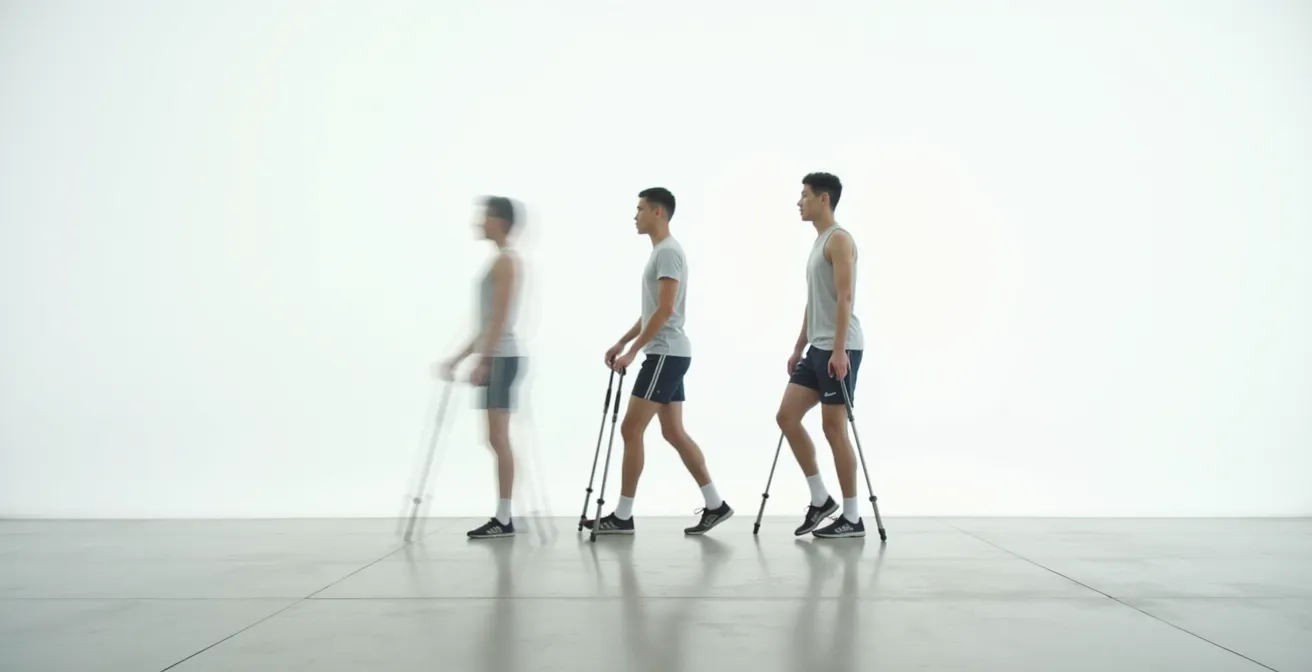
As shown in the visual sequence, the key is the simultaneous advancement of the contralateral crutch and foot. This coordinated movement provides a stable, triangular base of support throughout the stride, promoting balance and forward momentum. Below is a progressive protocol for mastering this essential skill.
- Begin with proper crutch fitting: Ensure a 15-30 degree elbow bend when holding the handgrips.
- Master the rhythm: Advance the right foot with the left crutch simultaneously, then the left foot with the right crutch.
- Start with short sessions: Practice for 5-10 minutes, 3-4 times daily to build endurance without fatigue.
- Practice on flat surfaces first: Maintain two points of floor contact at all times to ensure stability.
- Progress to subtle turns: As balance improves, begin practicing gentle turns and navigating around wide objects.
- Use a metronome: An app can help establish a consistent cadence and reduce the cognitive load of maintaining rhythm.
Loftstrand (Forearm) or Axillary (Underarm): Which Is Better for Long-Term Use?
While both forearm (Lofstrand) and axillary (underarm) crutches serve to offload a lower limb, their design dictates their suitability for different durations of use. Axillary crutches are typically prescribed for short-term injuries, such as a sprain or a fracture, where use is anticipated for only a few weeks. Forearm crutches are the clinical standard for individuals who require ambulatory support for months, years, or a lifetime due to chronic conditions, permanent weakness, or amputation. This distinction is rooted in fundamental differences in biomechanics, safety, and user control.
As the experts at St. Jude Children’s Research Hospital, a leading authority in pediatric rehabilitation, state, the choice is clear for extended use. They note:
Forearm crutches have several benefits over underarm crutches, especially for children who need to use crutches for an extended time.
– St. Jude Children’s Research Hospital, Together by St. Jude – Rehabilitation Guidelines
The primary advantage of forearm crutches is that they promote a more active and functional gait while avoiding the significant risk of nerve damage associated with axillary models. They demand more upper body and core engagement, which helps maintain muscle tone. Their compact design also allows for far greater maneuverability in tight spaces and makes tasks like opening doors or navigating stairs significantly easier. The following table breaks down the key distinctions for long-term consideration.
| Feature | Forearm (Lofstrand) Crutches | Axillary (Underarm) Crutches |
|---|---|---|
| Weight Distribution | Through arms and wrists | Risk of armpit pressure |
| Nerve Damage Risk | Minimal – bypasses brachial plexus | High – potential for crutch palsy |
| Long-term Suitability | Excellent for extended use | Best for short-term recovery |
| Maneuverability | Superior in tight spaces | More cumbersome |
| Upper Body Engagement | Promotes active grip and core strength | Passive support, potential atrophy |
| Posture Impact | Maintains natural alignment | Can cause shoulder hiking |
The Underarm Pressure Error That Causes Numbness in Fingers
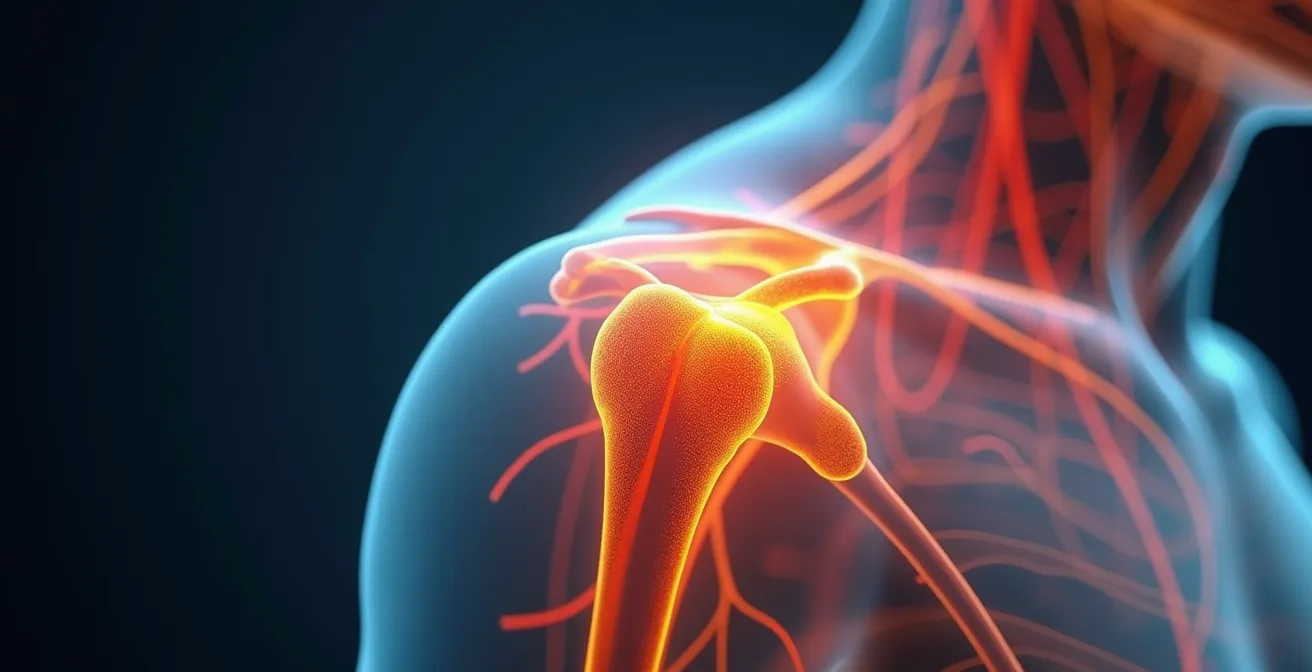
The most critical and dangerous error in axillary crutch use is leaning on the underarm pads, allowing the axilla (armpit) to bear the body’s weight. This common mistake directly compresses the brachial plexus, a complex network of nerves originating from the cervical spine (C5-T1) that controls all motor and sensory function in the arm and hand. This bundle, along with the axillary artery and vein, passes through the narrow space of the axilla, making it highly vulnerable to compression.
When a user “hangs” on their axillary crutches, the top pad exerts direct, sustained pressure on these nerves. This can lead to a condition known as “crutch palsy,” a form of neuropraxia (temporary nerve damage). The symptoms manifest as numbness, tingling, or weakness in the hand and fingers, as the signals through the radial, ulnar, and median nerves are disrupted. As medical literature documents, crutch palsy is observable in axilla crutch users who rest their weight on the shoulder rest, causing this direct nerve compression. If this pressure is not corrected, it can lead to more persistent nerve damage.
The correct technique for using axillary crutches is to press down on the handgrips, using the triceps and latissimus dorsi muscles to support the body. The underarm pads should only brush against the sides of the chest for lateral stability, with a two-to-three finger-width gap between the pad and the armpit. Because this technique is non-intuitive and fatiguing, users invariably revert to leaning. Forearm crutches completely eliminate this risk by design, as there is no component that comes near the vulnerable brachial plexus, making them an inherently safer choice for long-term use.
How to Adjust the Cuff to Prevent Chafing on Your Arms?
Proper cuff adjustment on a forearm crutch is as critical as handle height for ensuring comfort, control, and injury prevention. An improperly positioned cuff can cause skin chafing, restrict movement, or fail to provide adequate support during a stumble. The cuff’s function is to secure the crutch to the forearm, allowing the user to let go of the handgrip for tasks like opening a door without the crutch falling. It also serves as the primary point of load transfer to the forearm. The goal is to find a balance between security and freedom of movement.
The cuff should be positioned on the proximal third of the forearm (the part closest to the elbow). A common clinical guideline is to place the top edge of the cuff approximately 1 to 2 inches (2.5 to 5 cm) below the olecranon process (the bony point of the elbow). This placement allows for a full, unimpeded range of elbow flexion without the cuff digging into the biceps or elbow joint. The cuff should be snug enough that it doesn’t rattle or slide down the arm, but loose enough to allow for quick release and not restrict circulation. For open cuffs, this means the arm can be easily removed; for closed or full cuffs, it should provide support without clamping down.
Dynamic testing is essential. Once adjusted, the user should perform a series of movements: reaching forward, turning, and simulating sitting and standing. The cuff should remain supportive without binding or causing friction. If specific pressure points are identified, applying moleskin or custom neoprene sleeves can provide targeted cushioning. The following checklist provides a systematic approach to achieving the optimal fit for both cuff and handle.
Your Action Plan: Dynamic Cuff and Handle Adjustment
- Cuff Position: Position the top of the cuff 1-2 inches (2.5-5 cm) below the elbow bend to ensure optimal range of motion.
- Handle Height: With your arm hanging naturally at your side, the handgrip should align with your wrist crease, resulting in a 20-30 degree elbow bend when holding it.
- Dynamic Fit Test: Perform movements like reaching and turning. The cuff should support your arm without binding or excessive rubbing.
- Cuff-to-Elbow Gap: Verify a gap of about three finger widths between the top of the forearm cuff and the bony point of your elbow.
- Cuff Type Check: For open cuffs, verify quick hand release is possible. For closed cuffs, ensure 360-degree support without restricting circulation.
The Cast Iron Mistake That Causes Wrist Fractures
The “cast iron mistake” for any crutch user is an instinctual but catastrophic error during a fall: attempting to break the fall with an outstretched hand while still gripping the crutch. This action channels the entire force of the body’s impact, plus the awkward leverage of the crutch, directly into the small bones of the wrist. It is a near-certain mechanism for producing a distal radius fracture (a break near the wrist), often a Colles’ fracture, which is complex and debilitating. This reflex must be unlearned and replaced with a practiced fall-recovery strategy.
The core principle of safe falling on crutches is to ditch the crutches and roll. Holding onto the crutches turns them into dangerous levers that can cause fractures or get entangled with the body. The goal is to get the crutches away from the body’s fall path and then absorb the impact with the larger, fleshier parts of the body (thighs, buttocks, back) by tucking and rolling. As research on lower limb injury recovery emphasizes, proper training in the use of mobility aids is crucial for preventing such secondary injuries. A “death-grip” on the handles, often caused by fear, is counterproductive as it delays the ability to release the crutches in an emergency.
Developing this skill requires conscious practice in a safe environment, such as on a gym mat or soft grass. The aim is to build the muscle memory to override the instinct to use the hands for protection. This training is not about becoming an acrobat; it is about programming a safer, automatic response to a loss of balance. The following techniques form the basis of a fall-recovery protocol for crutch users.
- Practice the ‘Triangle Formation’: When standing or moving slowly, always ensure the crutch tips and your healthy leg form a stable tripod to minimize balance loss in the first place.
- Learn Emergency Crutch Release: Practice a quick, lateral push to throw the crutches away from your body and clear your fall path.
- Master the ‘Tuck and Roll’: As you feel yourself falling, immediately tuck your chin to your chest and round your shoulders to protect your head, aiming to land on your side.
- Rehearse on Soft Surfaces: Build muscle memory by practicing controlled falls on a soft surface until the sequence becomes second nature.
Why Your Brain Needs to Re-Learn How to Trust Your Leg?
Following an injury or surgery, the physical healing of bone and tissue is only one part of the recovery equation. The other, equally important part is neurological: the brain must re-establish its trust in the affected limb’s ability to bear weight and maintain balance. This process is known as proprioceptive re-education. Proprioception is the body’s “sixth sense,” the unconscious awareness of its position in space, generated by receptors in muscles, tendons, and joints. An injury disrupts this system, creating a pain signal that teaches the brain the limb is unsafe.
The brain then develops a protective motor program, often called “fear-avoidance behavior,” where it consciously and unconsciously offloads the injured leg to prevent further pain. This is why individuals limp or overly rely on mobility aids long after the tissue has healed. Crutches play a vital role in this neural recalibration. They are not just for support; they are a tool for graded exposure. As physiotherapy expert Grant Tully explains, their primary function is to manage force.
The single most important concept to understand is that crutches exist to absorb the force that your injured leg cannot currently tolerate.
– Grant Tully, Your Wellness Nerd – Physiotherapy Expert Guide
By using crutches, a patient can begin to apply controlled, incremental amounts of weight to the healing leg. Each time the leg bears weight without causing a significant pain signal, it sends positive feedback to the brain. This gradually rewrites the “unsafe” motor program, rebuilding the brain’s confidence in the limb. The process involves slowly decreasing the force absorbed by the crutches and increasing the load on the leg, allowing the proprioceptive system to recalibrate and restore a normal, confident gait. Without this conscious process of re-learning trust, a physical limp can become a permanent, neurologically ingrained habit.
Key Takeaways
- Forearm crutches are biomechanically superior for long-term use, protecting the wrist and promoting better posture.
- The two-point gait is the most efficient walking pattern, mimicking natural movement and conserving energy.
- Proper adjustment of both cuff and handle is essential for comfort, control, and preventing secondary injuries like chafing or nerve compression.
How to Wean Off Your Walker After Hip Surgery?
The transition away from a walker after hip surgery marks a significant milestone in recovery, signifying increased strength and stability. While many patients are guided towards a single cane, transitioning to forearm crutches can be a clinically superior option, especially for individuals aiming for a more active and symmetrical gait. A walker provides a very wide, stable base but encourages a forward-stooped posture and a slow, shuffling gait. Forearm crutches, conversely, promote an upright posture and a more dynamic, reciprocal walking pattern from the outset.
The timeline for this transition is guided by the surgeon and physical therapist, based on bone healing and muscle strength. While individual recovery varies, research indicates most patients transition from a walker to the next assistive device within 2 to 4 weeks post-operation. The weaning process should be gradual. It begins by using the walker for longer distances or on uneven terrain, while practicing with the forearm crutches for short periods on flat, indoor surfaces. This allows the body to adapt to the reduced base of support and increased demand on the core and hip stabilizer muscles.
The key is to focus on gait quality. When using the forearm crutches, the user should concentrate on maintaining an upright posture, taking equal-length steps, and engaging the two-point gait pattern as soon as it is comfortable. The goal is not to rush off the walker, but to build the strength and confidence to move with a more functional and efficient tool. Forearm crutches bridge the gap between the high stability of a walker and the minimal support of a cane, offering a pathway to a more active, long-term mobility solution that protects other joints and promotes a healthy posture.
By embracing a systematic, knowledge-based approach to this transition, you are not simply learning to walk with crutches; you are investing in a more durable, active, and posturally sound future. To apply these principles effectively, the next logical step is to consult with a physical therapist who can provide a personalized assessment and tailored gait training protocol.