
In summary:
- Transform your kitchen from an obstacle course into an ergonomic workspace by designing strategic “action zones.”
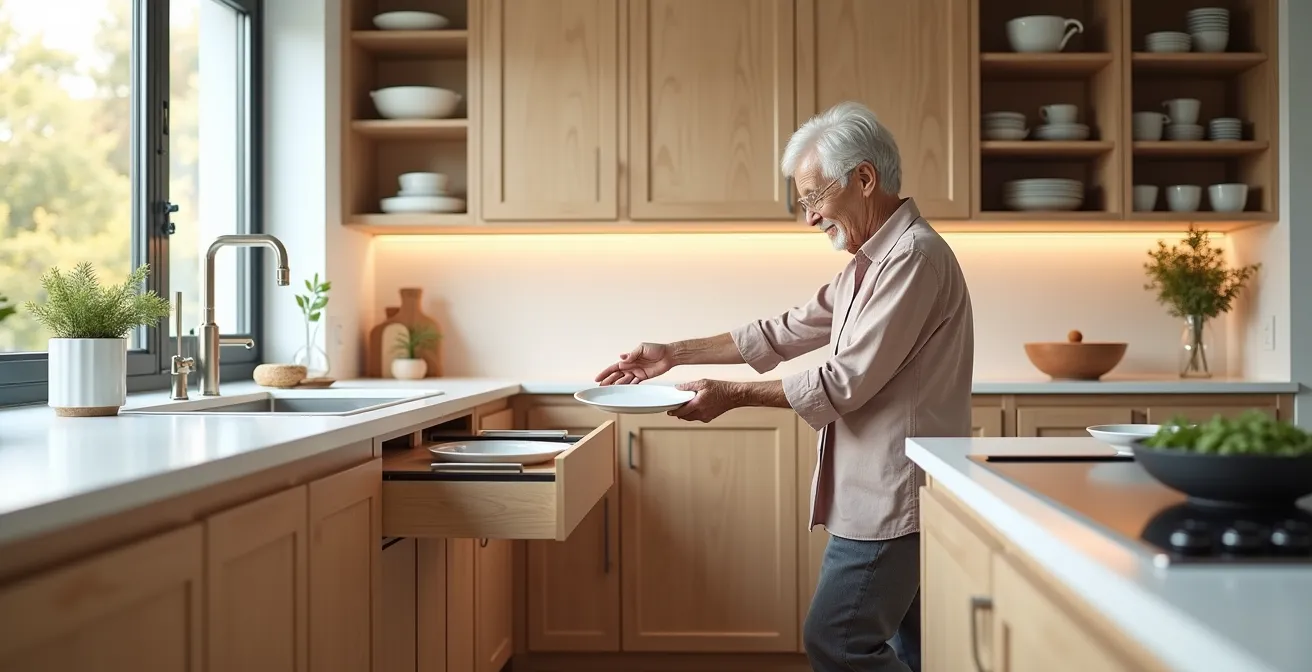
- Prioritize dynamic storage solutions like pull-down shelves and rolling carts that bring items to you, eliminating reaching and bending.
- Optimize your kitchen’s workflow to reduce unnecessary walking and movement between your prep, cooking, and cleaning areas.
- Enhance safety with targeted solutions like induction cooktops and high-quality under-cabinet lighting to prevent common accidents.
For many seniors who love to cook, the kitchen can slowly transform from a place of joy into a daily obstacle course. The reach for a favorite spice on the top shelf, the deep bend to retrieve a heavy pot, the precarious balance on a step stool—these small moments add up, creating exhaustion and a genuine risk of falling. The common advice to “declutter” or “keep frequently used items within reach” is a start, but it fails to address the fundamental problem: a kitchen that wasn’t designed for aging in place.
But what if the solution wasn’t just about moving a few items around? What if you could redesign your kitchen’s entire workflow to eliminate the need for climbing, stretching, and straining altogether? The key is to stop thinking about simple organization and start thinking like an ergonomic designer. It’s about creating a “no-reach” environment where your kitchen works for you, not against you. This approach focuses on creating strategic “action zones” and implementing dynamic storage that brings everything you need directly to your fingertips.
This guide will walk you through this ergonomic redesign process. We will explore how to enhance safety with modern appliances, compare cost-effective storage solutions that make your cabinets accessible, and redesign your workflow to save energy. We’ll even cover adaptive tools and exercises that can make daily kitchen tasks easier and safer, allowing you to focus on the passion of cooking, not the physical challenge of it.
To help you navigate these solutions, this article breaks down the key areas of a kitchen remodel focused on safety and accessibility. Explore the sections below to build a kitchen that supports your independence and love for cooking for years to come.
Summary: Reclaiming Your Kitchen: A Guide to Safe and Ergonomic Organization
- Why Induction Cooktops Are Safer Than Gas for Senior Kitchens?
- How to Install Under-Cabinet Lighting to Prevent Cutting Accidents?
- Pull-Down Mechanisms or Lowered Cabinets: Which Is More Cost-Effective?
- The “Back of the Fridge” Hazard That Causes Rotten Food Illness
- How to Reduce Walking Distance Between Sink and Stove?
- How to Perform Water Aerobics Movements Without Instructor Supervision?
- How to Set Up a “Sit-Down” Prep Station for Long Cooking Sessions?
- How to Chop Vegetables Safely With Arthritis in Your Hands?
Why Induction Cooktops Are Safer Than Gas for Senior Kitchens?
The open flame of a gas stove presents a constant risk, from igniting a loose sleeve to releasing unburned gas. For seniors, where reaction times may be slower and mobility is a concern, these risks are magnified. In fact, safety research highlights that burns are the second leading cause of home injury among seniors, making the cooktop a critical area for safety upgrades. Induction technology offers a fundamentally safer alternative by eliminating the flame entirely. It uses magnetic fields to heat the cookware directly, leaving the surrounding surface relatively cool to the touch moments after a pot is removed.
This direct heating method not only prevents burns from an open flame but also reduces the risk of accidental fires. Modern induction cooktops are designed with an array of built-in safety features specifically beneficial for an aging-in-place kitchen. These aren’t just gadgets; they are proactive safety nets. For instance, many models have sensors that automatically shut off a heating element when a pot is removed or if it boils dry, preventing scorched pans and potential smoke hazards. The controls are often front-mounted, eliminating the dangerous need to reach over hot pots and pans.
When selecting an induction cooktop, look for these key safety functions:
- Automatic Shut-Off: The unit turns off after a set period of inactivity, a crucial feature to prevent it from being left on accidentally.
- Pot Detection Sensors: The heating element will not activate unless a compatible pot is placed on it, and it deactivates the moment the pot is lifted.
- Clear Visual Indicators: Bright lights that show exactly which cooking zones are active or still retaining residual heat.
- Lockout Features: A “child lock” function is equally effective at preventing accidental activation by an adult who might lean against the controls.
How to Install Under-Cabinet Lighting to Prevent Cutting Accidents?
One of the most overlooked hazards in the kitchen is poor lighting. Overhead fixtures often cast shadows on countertops, exactly where sharp knives and other tools are being used. This creates a low-contrast environment where it’s difficult to distinguish your fingers from the food you’re chopping, significantly increasing the risk of cuts. Installing under-cabinet task lighting is not a luxury—it’s a critical safety feature that directly illuminates your work surface, eliminating shadows and improving visibility for safer food preparation.
Modern solutions go beyond a simple switch. A case study on senior kitchen safety found that implementing motion-activated lighting was particularly effective. The lights turn on automatically as you approach the counter, which is ideal for nighttime trips to the kitchen and prevents fumbling for switches in the dark. Furthermore, the study highlighted a crucial technical detail often missed: choosing LED lights with a high Color Rendering Index (CRI). A CRI of 90 or higher helps seniors more accurately distinguish food freshness and enhances the contrast between food and fingers, a key factor in preventing accidents.
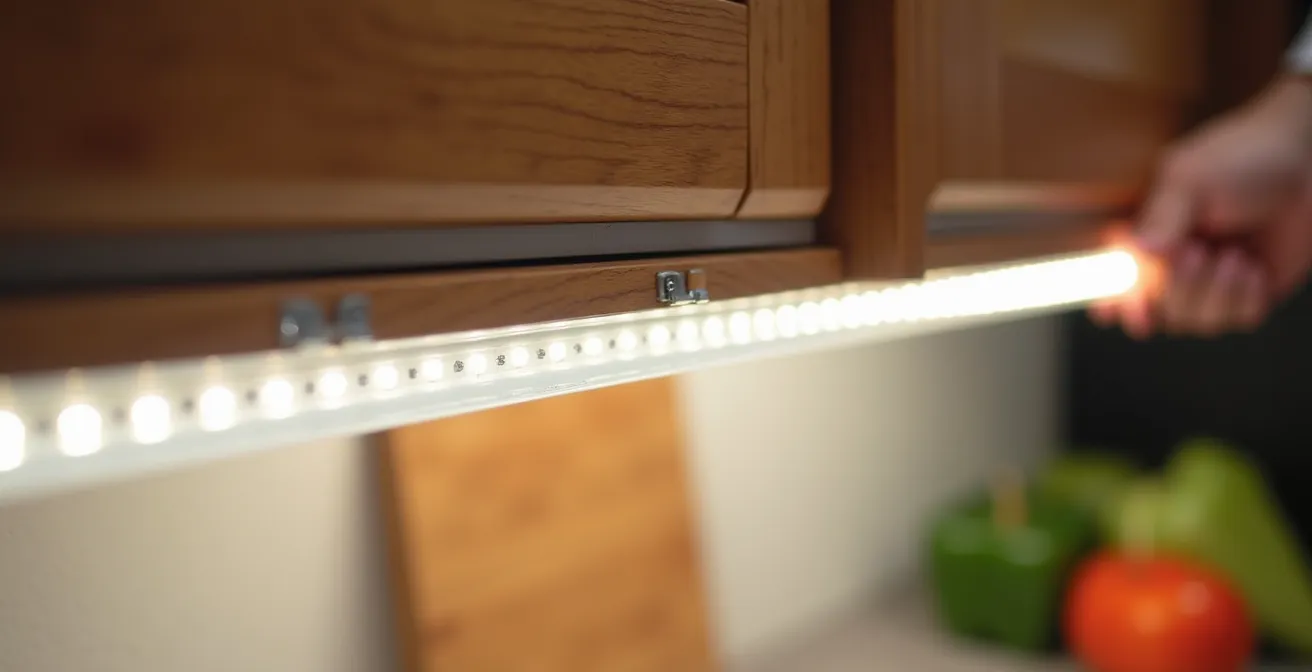
As shown in the image, modern LED strip lighting is low-profile and easy to install. These systems provide continuous, even light across the entire workspace. When planning an installation, consider a plug-in system for simplicity or a hardwired system for a more permanent, seamless look. Placing the lights towards the front of the cabinet, angled slightly back, provides the best illumination on the counter without creating glare in your eyes.
Pull-Down Mechanisms or Lowered Cabinets: Which Is More Cost-Effective?
The highest shelves of upper cabinets are often a no-go zone, forcing a reliance on unstable step stools. Two primary solutions exist to reclaim this space: installing pull-down shelving mechanisms or undertaking a more significant renovation to lower the cabinets themselves. The choice between these options often comes down to a trade-off between cost, permanence, and functionality. Pull-down systems are a retrofit solution, making them ideal for renters or those seeking a less disruptive upgrade. Lowering cabinets is a permanent modification that offers maximum accessibility but at a significantly higher cost and complexity.
To make an informed decision, it’s helpful to compare the factors directly. As detailed in a recent comparative analysis of aging-in-place modifications, the differences in cost and effort are substantial.
| Factor | Pull-Down Mechanisms | Lowered Cabinets |
|---|---|---|
| Installation Cost | $150-500 per cabinet | $2,000-5,000 full remodel |
| Reversibility | Fully reversible for renters | Permanent modification |
| Weight Capacity | 20-35 lbs typically | Standard cabinet capacity |
| Physical Effort Required | Moderate pulling/pushing force | Minimal – items at optimal height |
| DIY Installation | Possible with basic tools | Requires professional contractor |
However, an ergonomic designer would argue against a purely binary choice. The most effective and personalized solution is often a hybrid approach. This strategy involves selectively applying different solutions based on usage frequency and the items being stored. For example, you might install a pull-down shelf in one cabinet for lighter, occasionally used items like spices or glassware. In another key area, you could lower a single cabinet to counter height to create an “appliance garage” for your daily-use toaster and coffee maker. This customized strategy delivers the highest functional return for the investment, creating a kitchen tailored to your specific needs.
The “Back of the Fridge” Hazard That Causes Rotten Food Illness
The kitchen holds dangers beyond falls and burns. A disorganized refrigerator can become a significant health hazard, particularly for seniors. Items get pushed to the back, forgotten, and left to spoil, creating a breeding ground for bacteria. For older adults, the consequences are more severe; according to home care safety experts, adults 65 and older are much more likely to be hospitalized or even die from a foodborne illness. The “out of sight, out of mind” nature of a deep refrigerator makes it a primary risk zone that requires a systematic approach to manage.
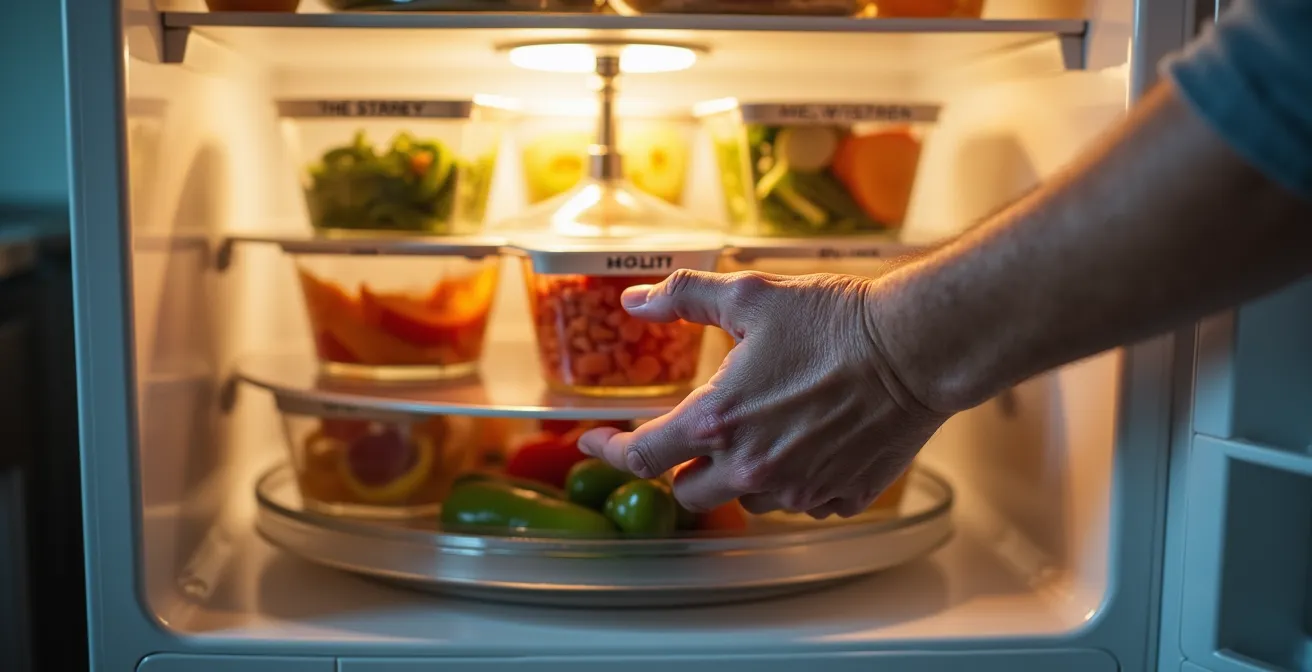
The solution is to create a system that ensures full visibility and access to everything inside. Forget trying to remember what’s in the back; bring the back of the fridge to you. Installing turntables or “Lazy Susans” on refrigerator shelves is a game-changing modification. With a simple spin, items from the back are brought to the front, making it impossible for anything to get lost. Paired with clear, stackable containers, this system transforms a cluttered space into a highly organized and safe food storage area.
To maintain this organization, implement a strict First-In, First-Out (FIFO) system. This is the same method used by restaurants to ensure food freshness and safety. It’s a simple discipline: when you buy a new item, place it behind the older one you already have. This guarantees you always use up the older food first. Performing a quick audit of your fridge is the first step to implementing this safer system.
Your 5-Step Fridge Safety Audit: Implementing a FIFO System
- Label Everything: Use large-print, smudge-proof markers to label all containers with the date they were opened or prepared. Make this a non-negotiable habit.
- Create Designated Zones: Assign specific areas in the fridge for different food categories (e.g., dairy, meats, leftovers, vegetables) to quickly see what you have.
- Use Clear Containers: Exclusively use transparent containers. If you can’t see what’s inside, it’s more likely to be forgotten.
- Rotate Your Stock Consistently: When adding new groceries, always move existing items to the front and place the new items behind them.
- Schedule a Weekly Check: Set a recurring reminder once a week to quickly scan for any items nearing their expiration date and plan to use them.
How to Reduce Walking Distance Between Sink and Stove?
Classic kitchen design theory talks about the “work triangle”—the path between the sink, stove, and refrigerator. In a large or poorly laid-out kitchen, this triangle can become a marathon, requiring multiple trips back and forth across the room. Carrying a heavy pot of water from the sink to the stove or transporting freshly washed vegetables can be tiring and increase the risk of spills and falls. The principle of motion economy is crucial here: the goal is to minimize steps, turns, and travel distance to conserve energy and enhance safety.
While a full renovation to move your sink or stove is often impractical, you can create an “ergonomic bridge” between these key work zones without any construction. A brilliant and affordable solution is a mobile prep station or rolling kitchen cart. A case study documented how seniors successfully used lightweight rolling tables as a bridge. They would position the cart next to the sink to wash and chop vegetables, then simply roll the entire station over to the stove for immediate cooking. This eliminated multiple trips, and carts with locking wheels provided a stable surface wherever needed.
Beyond a rolling cart, you can further optimize this workflow with a few simple changes:
- Zone Your Equipment: Store the pots, pans, and utensils you use most frequently in the cabinets or drawers located directly between the sink and the stove.
- Create a Mini-Prep Surface: If space allows, place a small, sturdy cutting board next to the stove to create a dedicated spot for last-minute prep.
- Keep Water On-Hand: Place a stylish pitcher of water near the stove. This can be used to top up simmering pots, reducing the number of trips to the sink.
- Use a “Bus Tub”: A simple plastic tub, like those used in restaurants, is excellent for transporting multiple small items (spices, oils, prepped ingredients) in a single, stable trip.
How to Perform Water Aerobics Movements Without Instructor Supervision?
While reorganizing the kitchen is paramount, maintaining the physical strength and balance to navigate it safely is equally important. Surprisingly, one of the best activities to support kitchen mobility isn’t performed in the kitchen at all—it’s done in a pool. Water aerobics is exceptionally beneficial for seniors because the buoyancy of the water supports the body, reducing stress on joints while the water’s resistance builds muscle. This allows for the safe practice of movements that directly translate to kitchen activities.
A recent study documented how seniors engaging in regular water exercises showed marked improvements in their ability to perform common kitchen tasks. The practice of core twists and single-leg balances in the pool directly improved their stability when turning and carrying items. Furthermore, the supportive environment of the water allowed them to practice deep squatting motions, which strengthened the exact muscles needed to safely reach into lower cabinets without straining their backs or knees. The key is performing these movements in a controlled and safe manner, even without direct supervision.
To exercise safely on your own, focus on three principles. First, always use the “talk test” to monitor your exertion; you should be able to hold a conversation while moving. If you’re too breathless to speak, ease up. Second, prioritize safety equipment. Wear water shoes to prevent slipping and consider a flotation belt for extra stability, especially when starting out. Finally, always stay near the edge of the pool so you have a stable support to grab if you feel unsteady.
How to Set Up a “Sit-Down” Prep Station for Long Cooking Sessions?
The joy of preparing a complex meal or batch cooking for the week can be overshadowed by the physical toll of standing for long periods. Foot, back, and leg fatigue can set in, making the experience draining and even increasing the risk of a misstep or a fall. Creating a dedicated, ergonomic “sit-down” prep station is a transformative adaptation that allows you to conserve energy and continue cooking comfortably for longer. This isn’t about pulling a dining chair up to the counter; it’s about designing a workspace that is optimized for a seated position.
The ideal seated prep station is both comfortable and functional, bringing the work to you. The goal is to create an environment where you can chop, mix, and assemble ingredients without straining your neck, back, or shoulders. This can be achieved with a few key components, often without any permanent modifications to your kitchen. A rolling, C-shaped table is an excellent centerpiece, as its base can slide under a chair or wheelchair, bringing the work surface comfortably close.
To create your own ergonomic seated station, gather these essential items:
- A Suitable Table: Select a rolling C-shaped table or a small, adjustable-height table. When seated, the surface should be positioned 2-3 inches below your elbow height to allow for a neutral wrist posture.
- A Contained Workspace: Use a large cutting board with a lip or a simple baking tray to define your work area. This contains messes and prevents items like vegetables from rolling away.
- An Ergonomic Tool Caddy: Pre-stock a small caddy with your most-used ergonomic tools, such as rocking knives, palm-pressure choppers, and jar openers, so they are always within easy reach.
- Dedicated Task Lighting: Position a small, bright lamp to shine directly onto your prep area, ensuring clear visibility without creating glare.
Key takeaways
- Design for “Action Zones”: Focus on keeping 80% of your daily-use items in the ergonomic space between your shoulders and knees.
- Embrace “Dynamic Storage”: Use solutions like pull-down shelves, turntables, and pull-out drawers that actively bring items to you.
- Optimize Your “Ergonomic Workflow”: Systematically reduce steps and movement between the sink, stove, and prep areas to conserve energy.
How to Chop Vegetables Safely With Arthritis in Your Hands?
For individuals with arthritis, the simple act of chopping vegetables can be a painful and frustrating task. A weak or painful grip makes holding a knife securely a challenge, increasing the risk of the blade slipping. The force required to cut through hard vegetables like carrots or squash can send a jolt of pain through the joints of the hand and wrist. However, giving up fresh, healthy ingredients is not the answer. The solution lies in a two-pronged approach: adopting adaptive cutting techniques and utilizing ergonomically designed tools.
Research from home care providers has shown just how effective this approach can be. One study found that seniors who used adaptive kitchen tools experienced 60% less hand pain during meal preparation. The study emphasized that selecting tools that reduce the need for fine motor control and gripping strength is often more effective than modifying technique alone. For example, a food processor with large, easy-to-press buttons can replace much of the manual chopping for soups and stews. Similarly, an ergonomic peeler with a large, soft-grip handle requires far less hand strength than a traditional one.
Combining these tools with safer techniques creates a comprehensive safety system. Here are some key strategies to adopt:
- Use a Rocking Knife: A mezzaluna, or rocking knife, allows you to use a two-handed grip and the strength of your shoulders, rather than your wrists, to chop herbs and vegetables.
- Create a Flat Base: Before chopping a round vegetable like an onion or potato, cut a small slice off one side to create a flat, stable base. This prevents it from rolling on the cutting board.
- Soften Hard Vegetables: Briefly microwaving very hard vegetables like butternut squash or carrots for a minute or two can soften them just enough to make cutting significantly easier.
- Switch to Choppers: For items like onions and nuts, a palm-pressure vegetable chopper requires a simple push from above, eliminating the need for a tight grip on a knife handle.
- Keep Knives Sharp: This may seem counterintuitive, but a professionally sharpened knife requires far less force to cut, reducing the strain on your joints and making the blade less likely to slip.
The first step to a safer kitchen is a simple one: take an honest look at your current space and identify one or two key frustration points. By applying the ergonomic principles and targeted solutions in this guide, you can begin to systematically transform your kitchen back into a place of creativity, nourishment, and joy.
Frequently Asked Questions on How to Reorganize Kitchen Cabinets to Avoid Climbing Step Stools?
How can I monitor my exertion level without an instructor?
Use the ‘talk test’ – you should be able to carry on a conversation while exercising. If you’re too breathless to speak, reduce intensity immediately.
What safety equipment should I have for solo pool exercises?
Always exercise near the pool edge for support, wear water shoes for traction, and consider using a flotation belt for added stability during movements.
How do water exercises translate to kitchen safety?
Water resistance training strengthens the same muscles used for lifting pots, reaching into cabinets, and maintaining balance while carrying items across the kitchen.